Create a Model
Communicate about complex reality
In this topic, multiple ways are presented to create a Model in Dragon1. The topic starts with the explanation of models in Dragon1. Followed by the latest and most intuitive way to create a model. Finally, the classic way is shown, which is more formal and time-consuming.
What is a Model?
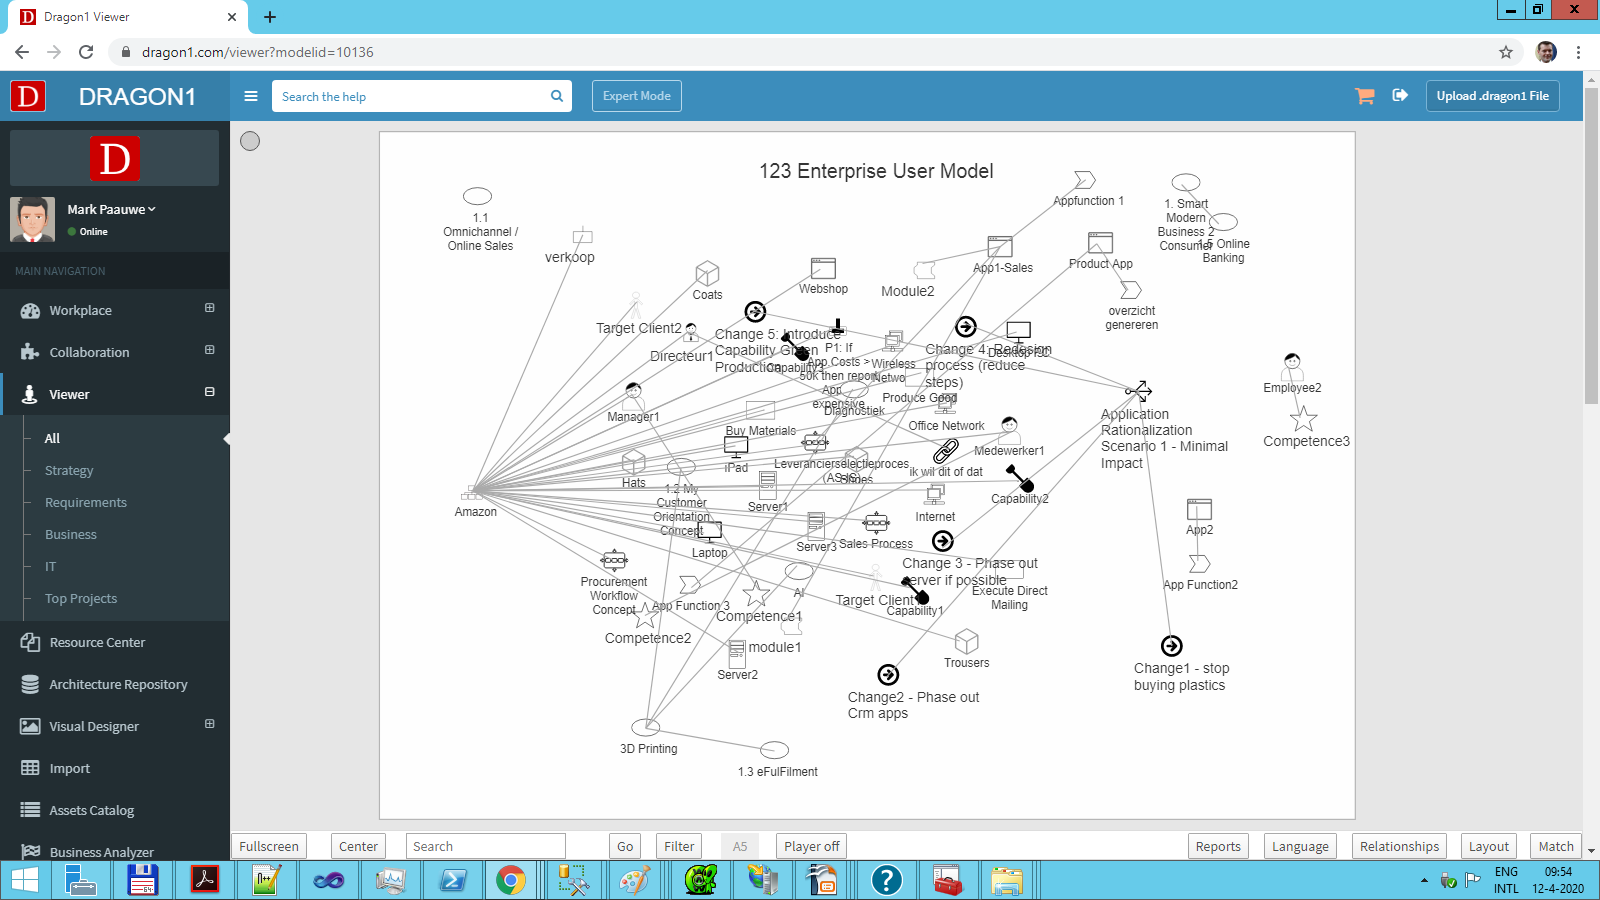
A model is a related set of entities. The visualization below shows an example of a complex enterprise model with many related entities. Every line that connects two shapes represents a relationship, and every shape represents an entity.
Why create a Model?
The big advantage of using a model is it helps in communicating with others about something complex.
An official definition of a model is:
'A simplified representation of reality (or the real world) to able to communicate about that reality (or the real world).'
With a model, the reality is simplified by omitting aspects irrelevant to the communication. Otherwise, it would take forever to build the model, and then no time would be left for communication.
A diagram is a graphical representation of a model, whether that model is explicit or not. Dragon1 distinguishes between diagrams and models to give more freedom to design solutions. On Dragon1, one can draw static diagrams (graphical schemas) directly or generate dynamic diagrams based on models.
Furthermore, one can do meta-modeling, meaning you can create meta models, user models, and instance models.
Learning Objectives
By following the lecture, one should be able to:
- Know what a model is and know its use.
- Use the Data Dashboard.
- Design a model.
- Generate a model.
- Drag and draw entity shapes on a canvas.
- Add attributes to a model.
- Draw relationships (links, connections) between entity shapes on a canvas.
- Setup relationships.
- Add shapes as entities to the model and the repository.
- Switch to the normal model to see how well entities are linked.
- Test a model on compliance for a modeling language (with its meta-model).
- Test a model on compliance with a reference model.
Method 1: Use the Data Dashboard
A 'First Responder' model is created in this scenario. In several simple steps, the basics are demonstrated for creating a Model with an Actor and a Role using the Data Dashboard.
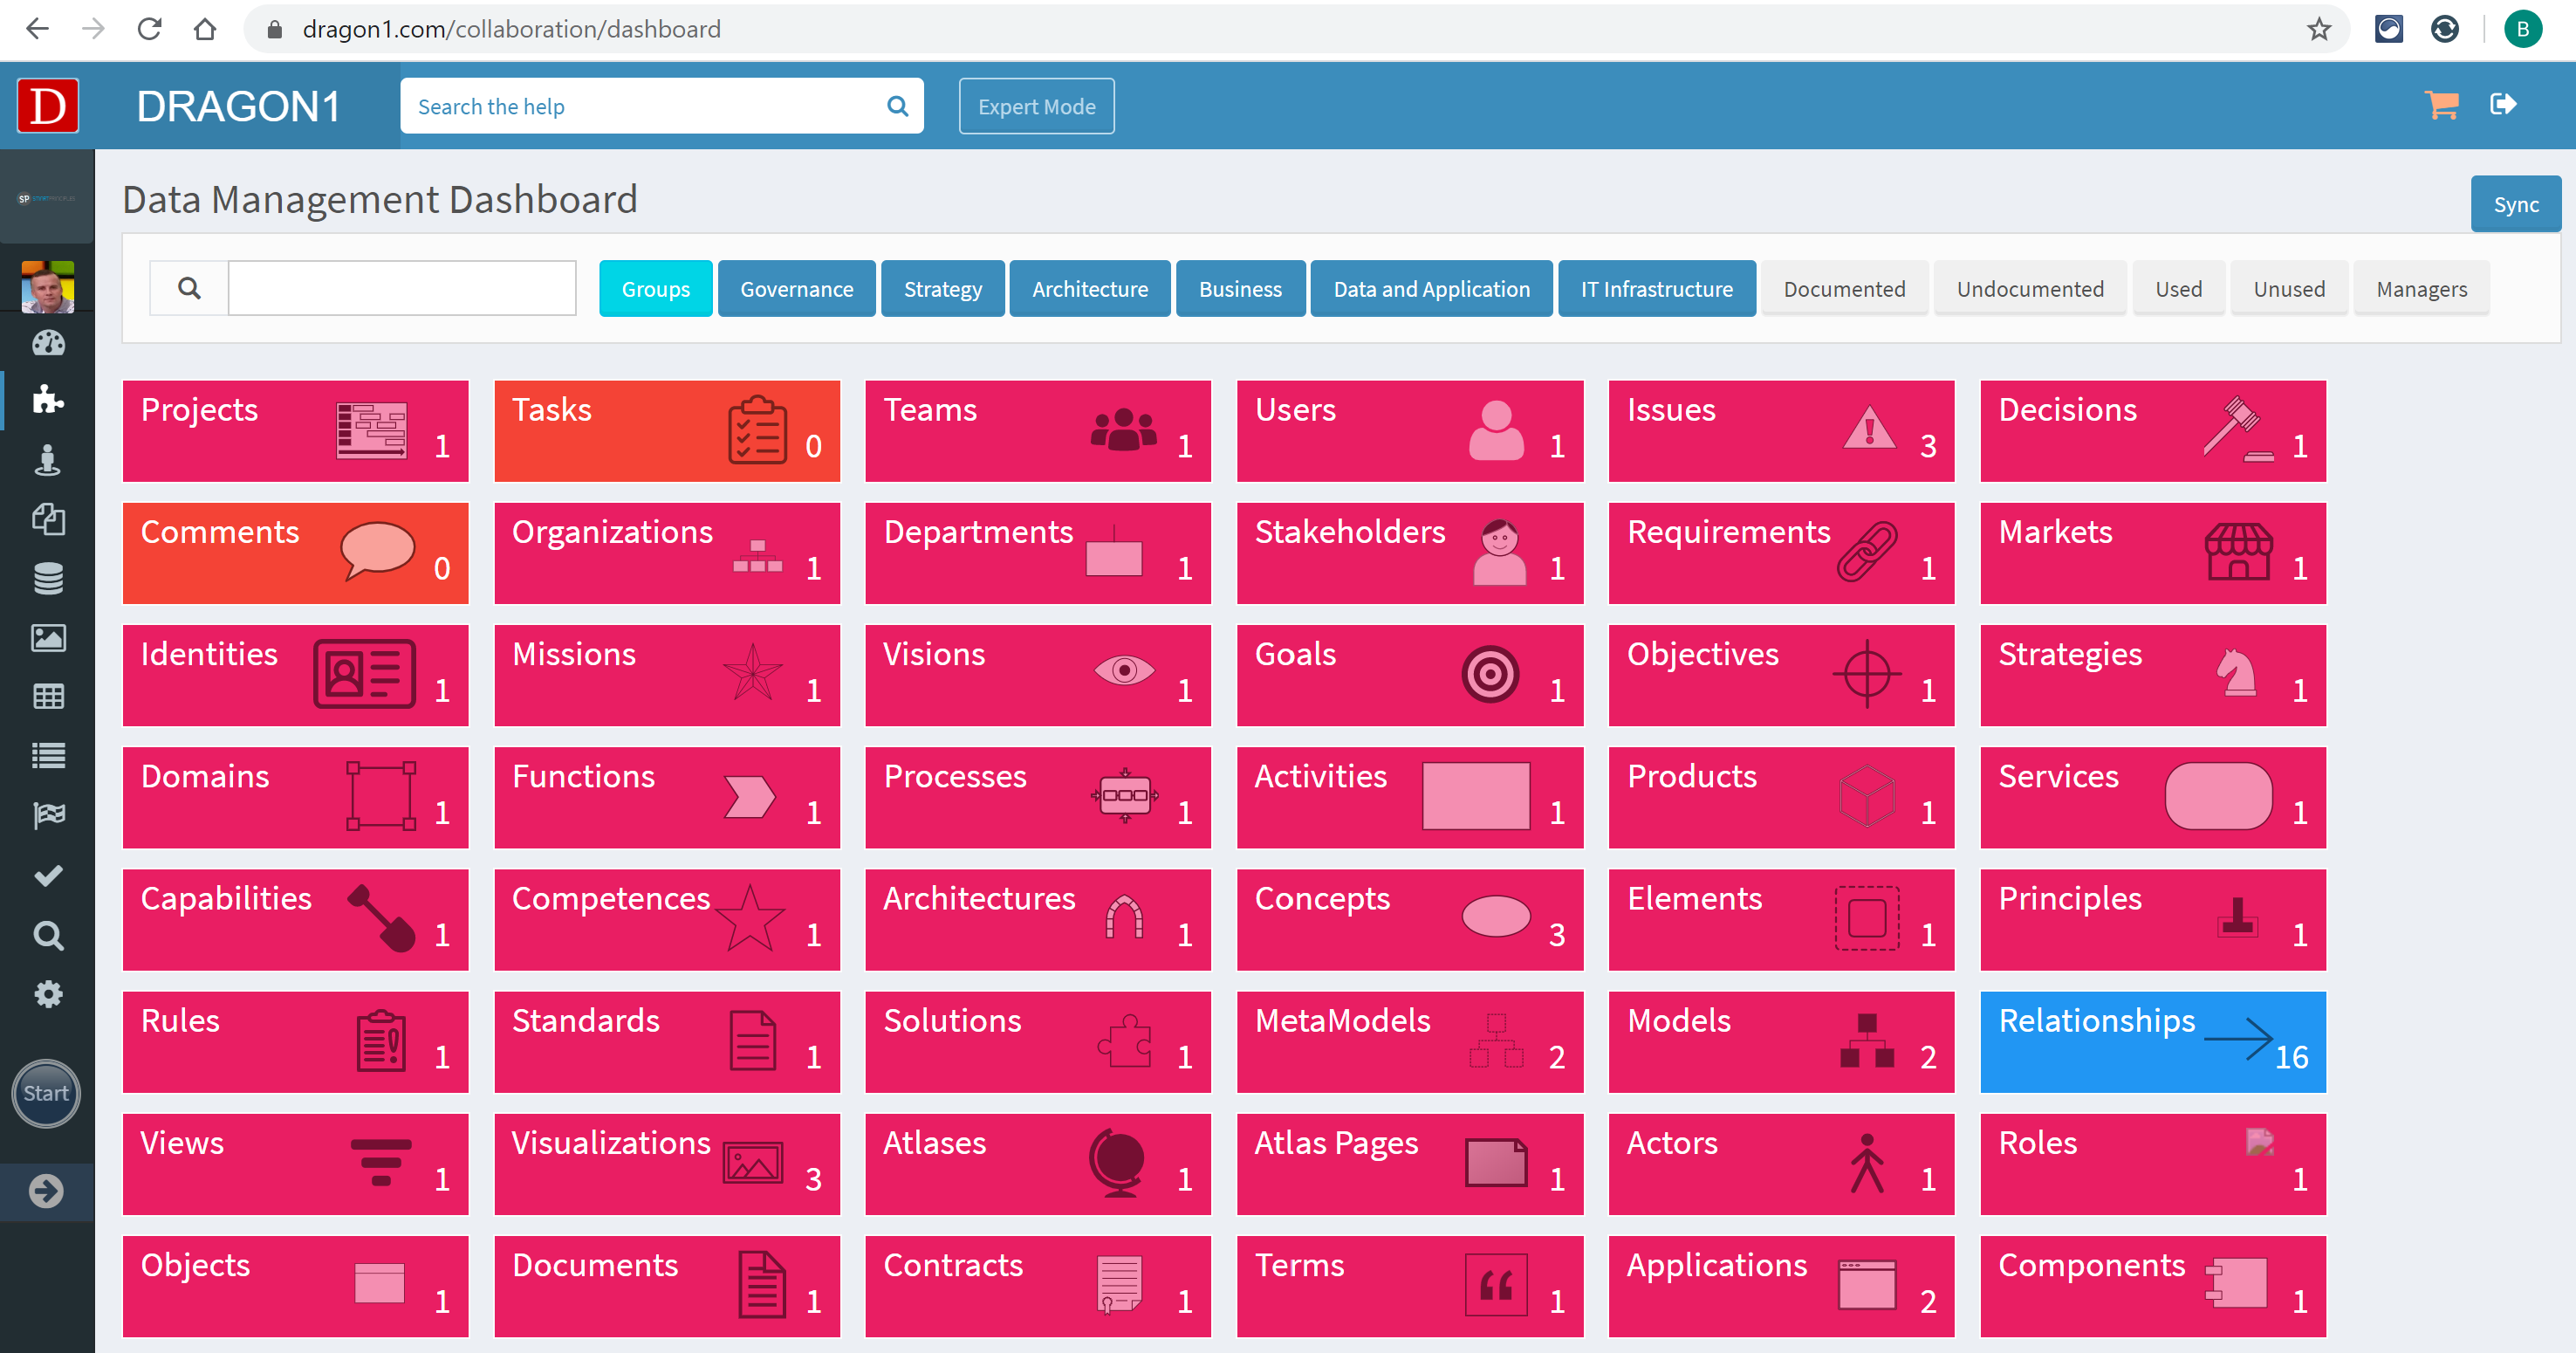
The Data Dashboard is an overview of all repository objects on Dragon1 presented as tiles. Per tile, a counter is shown in which the number of objects is presented. Once the number of objects per tile rises, the color of the tile will change.
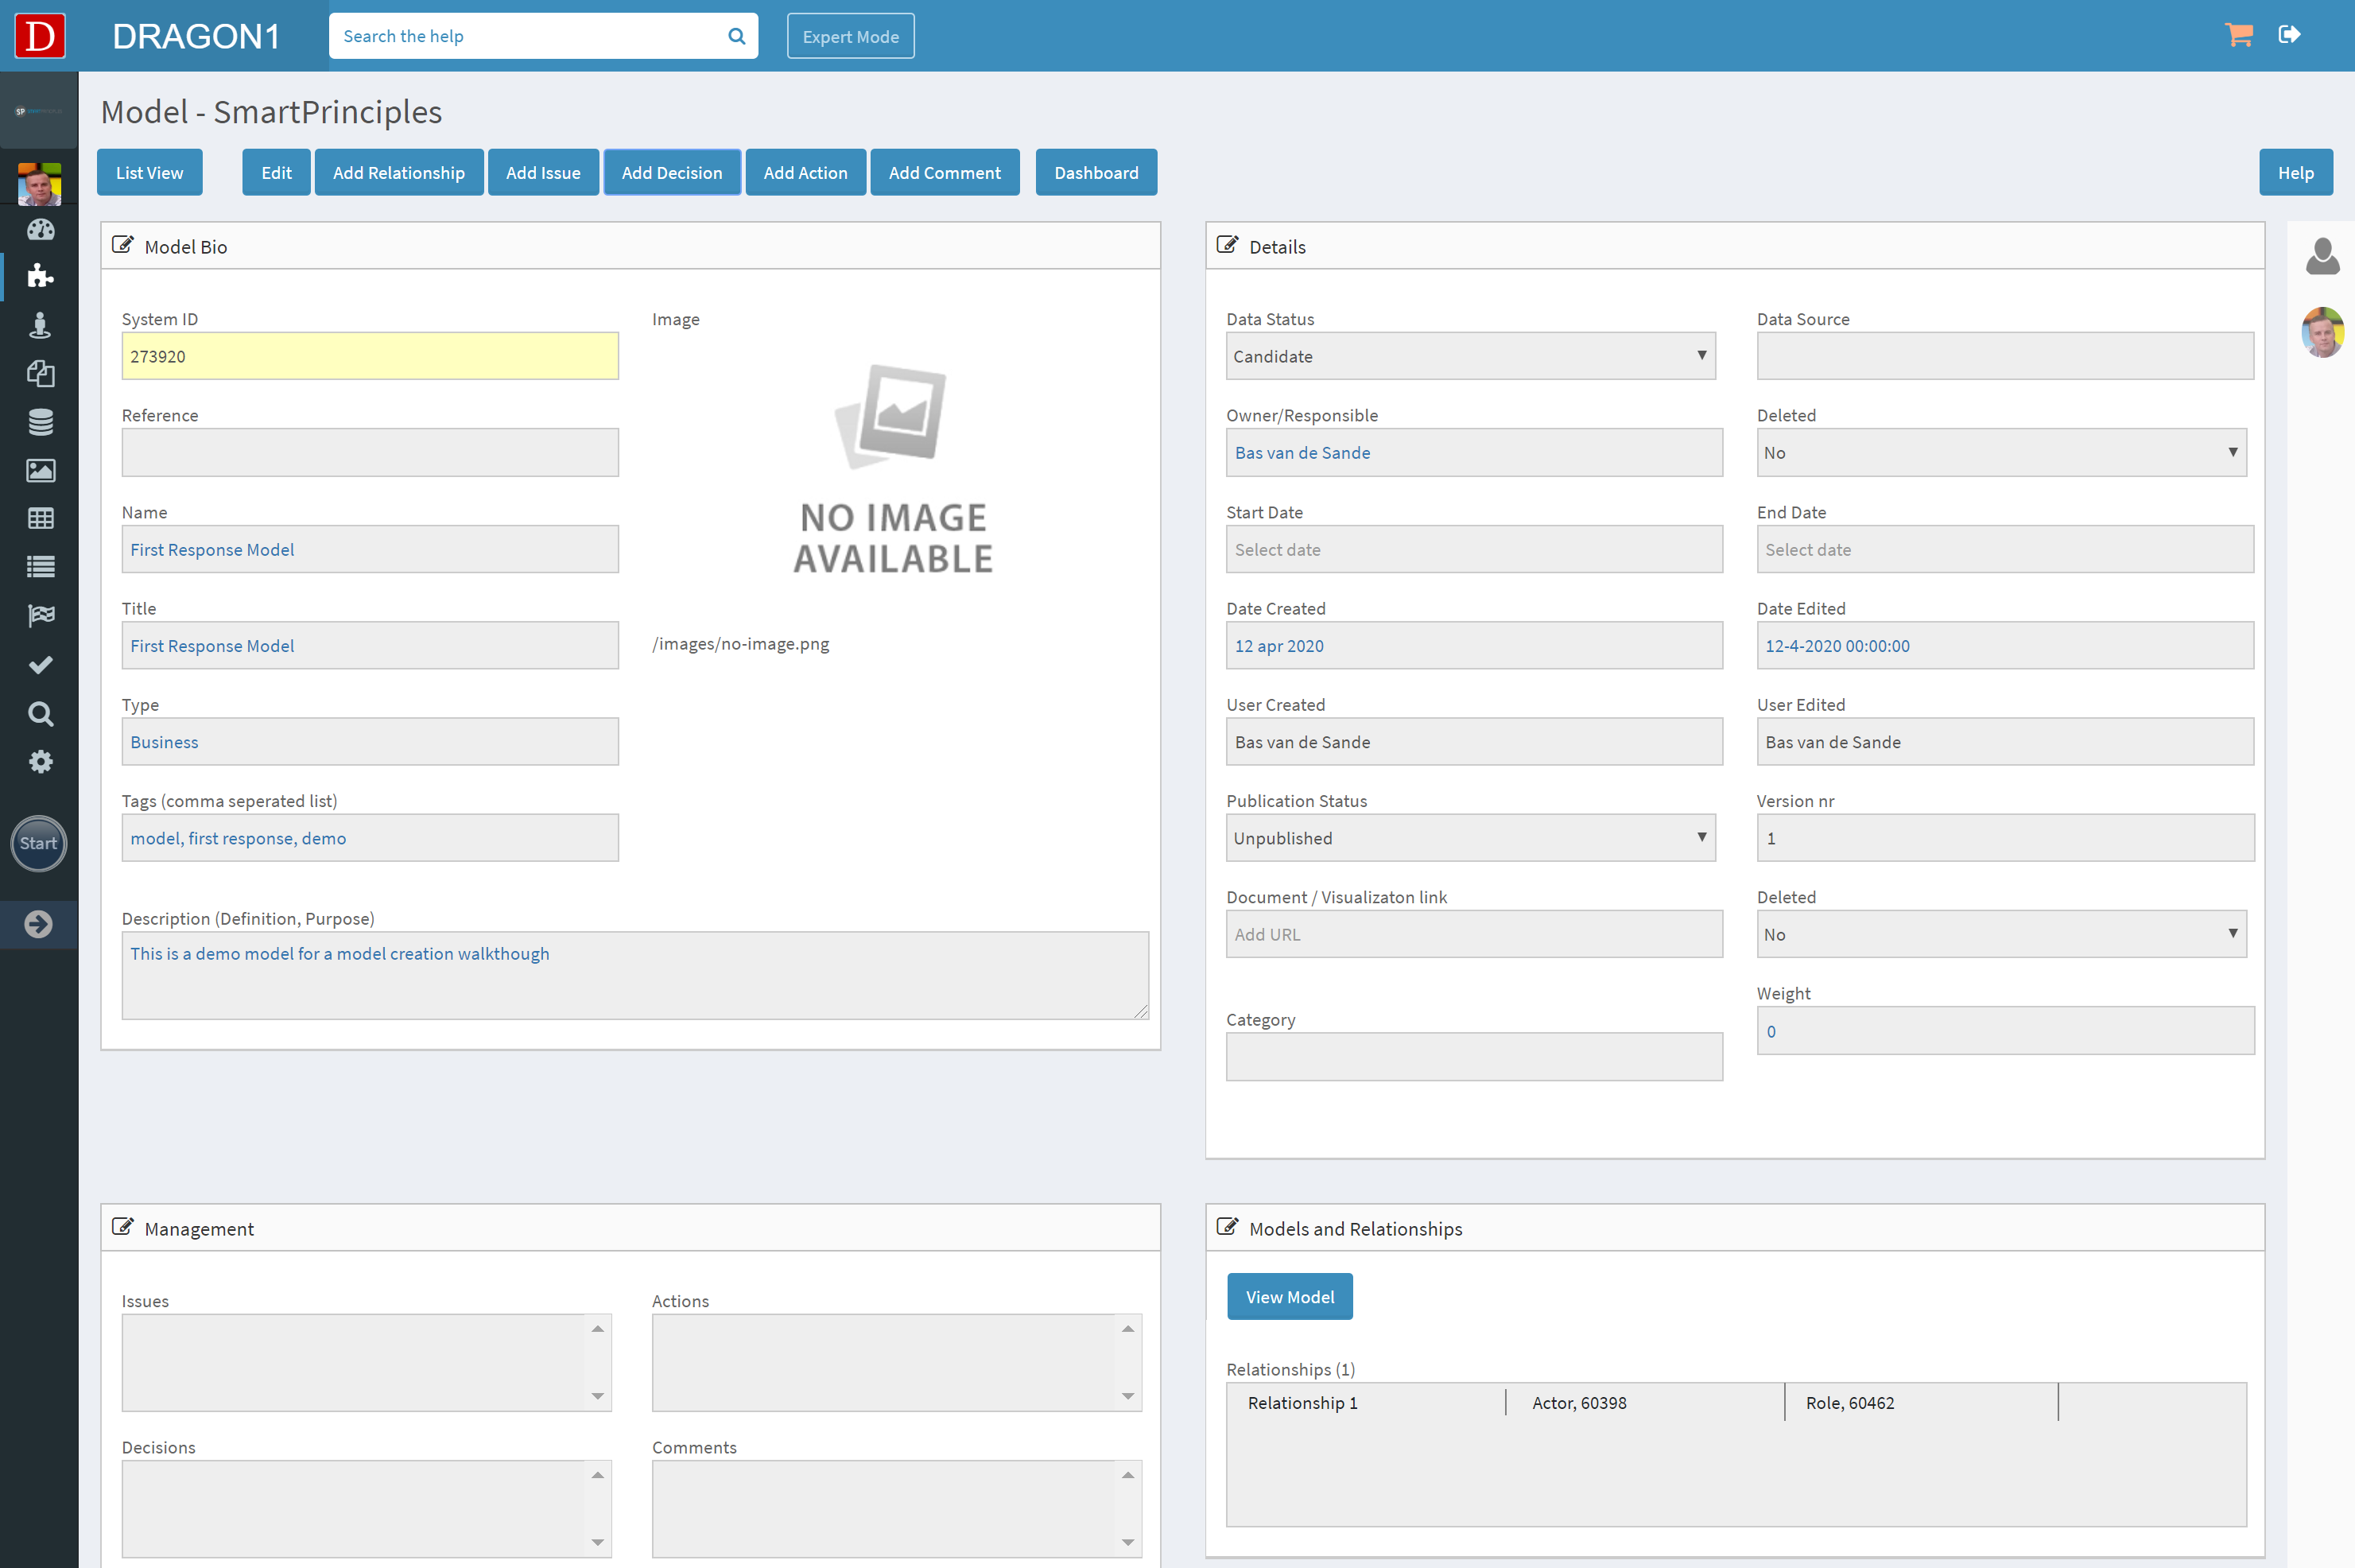
Step 1: Add a Model
The first step is to create a model. To achieve this, one can click on the Model tile in the Data Dashboard.
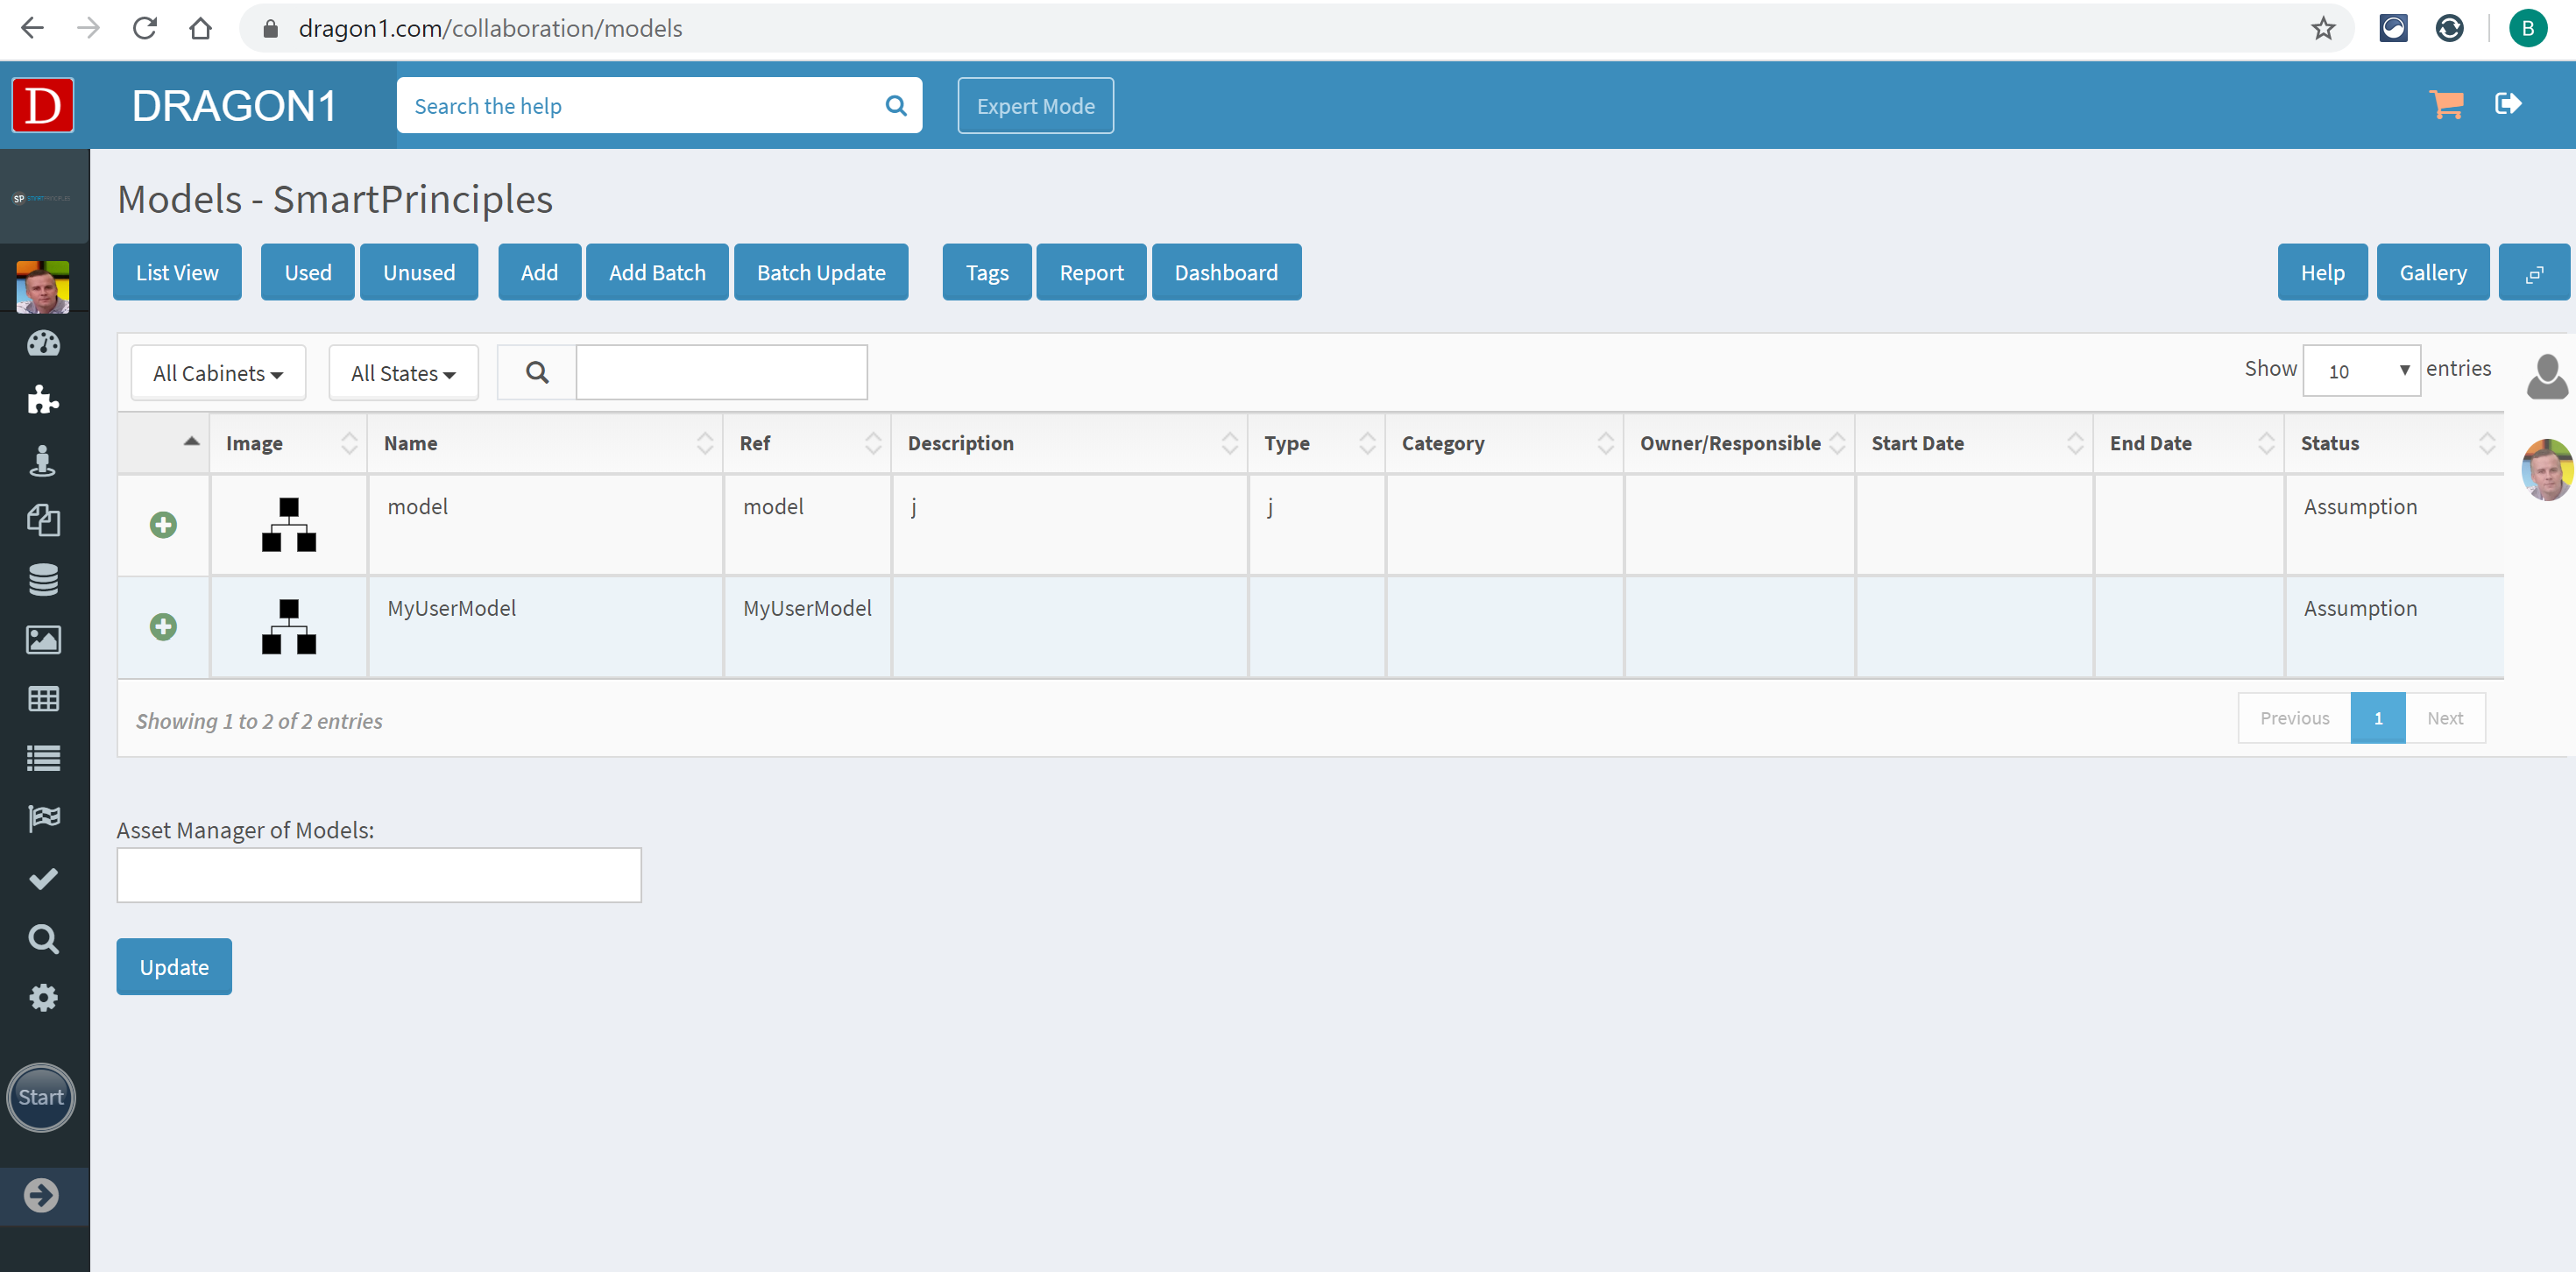
The following screen appears.
Click the 'Add' button to add a new Model.
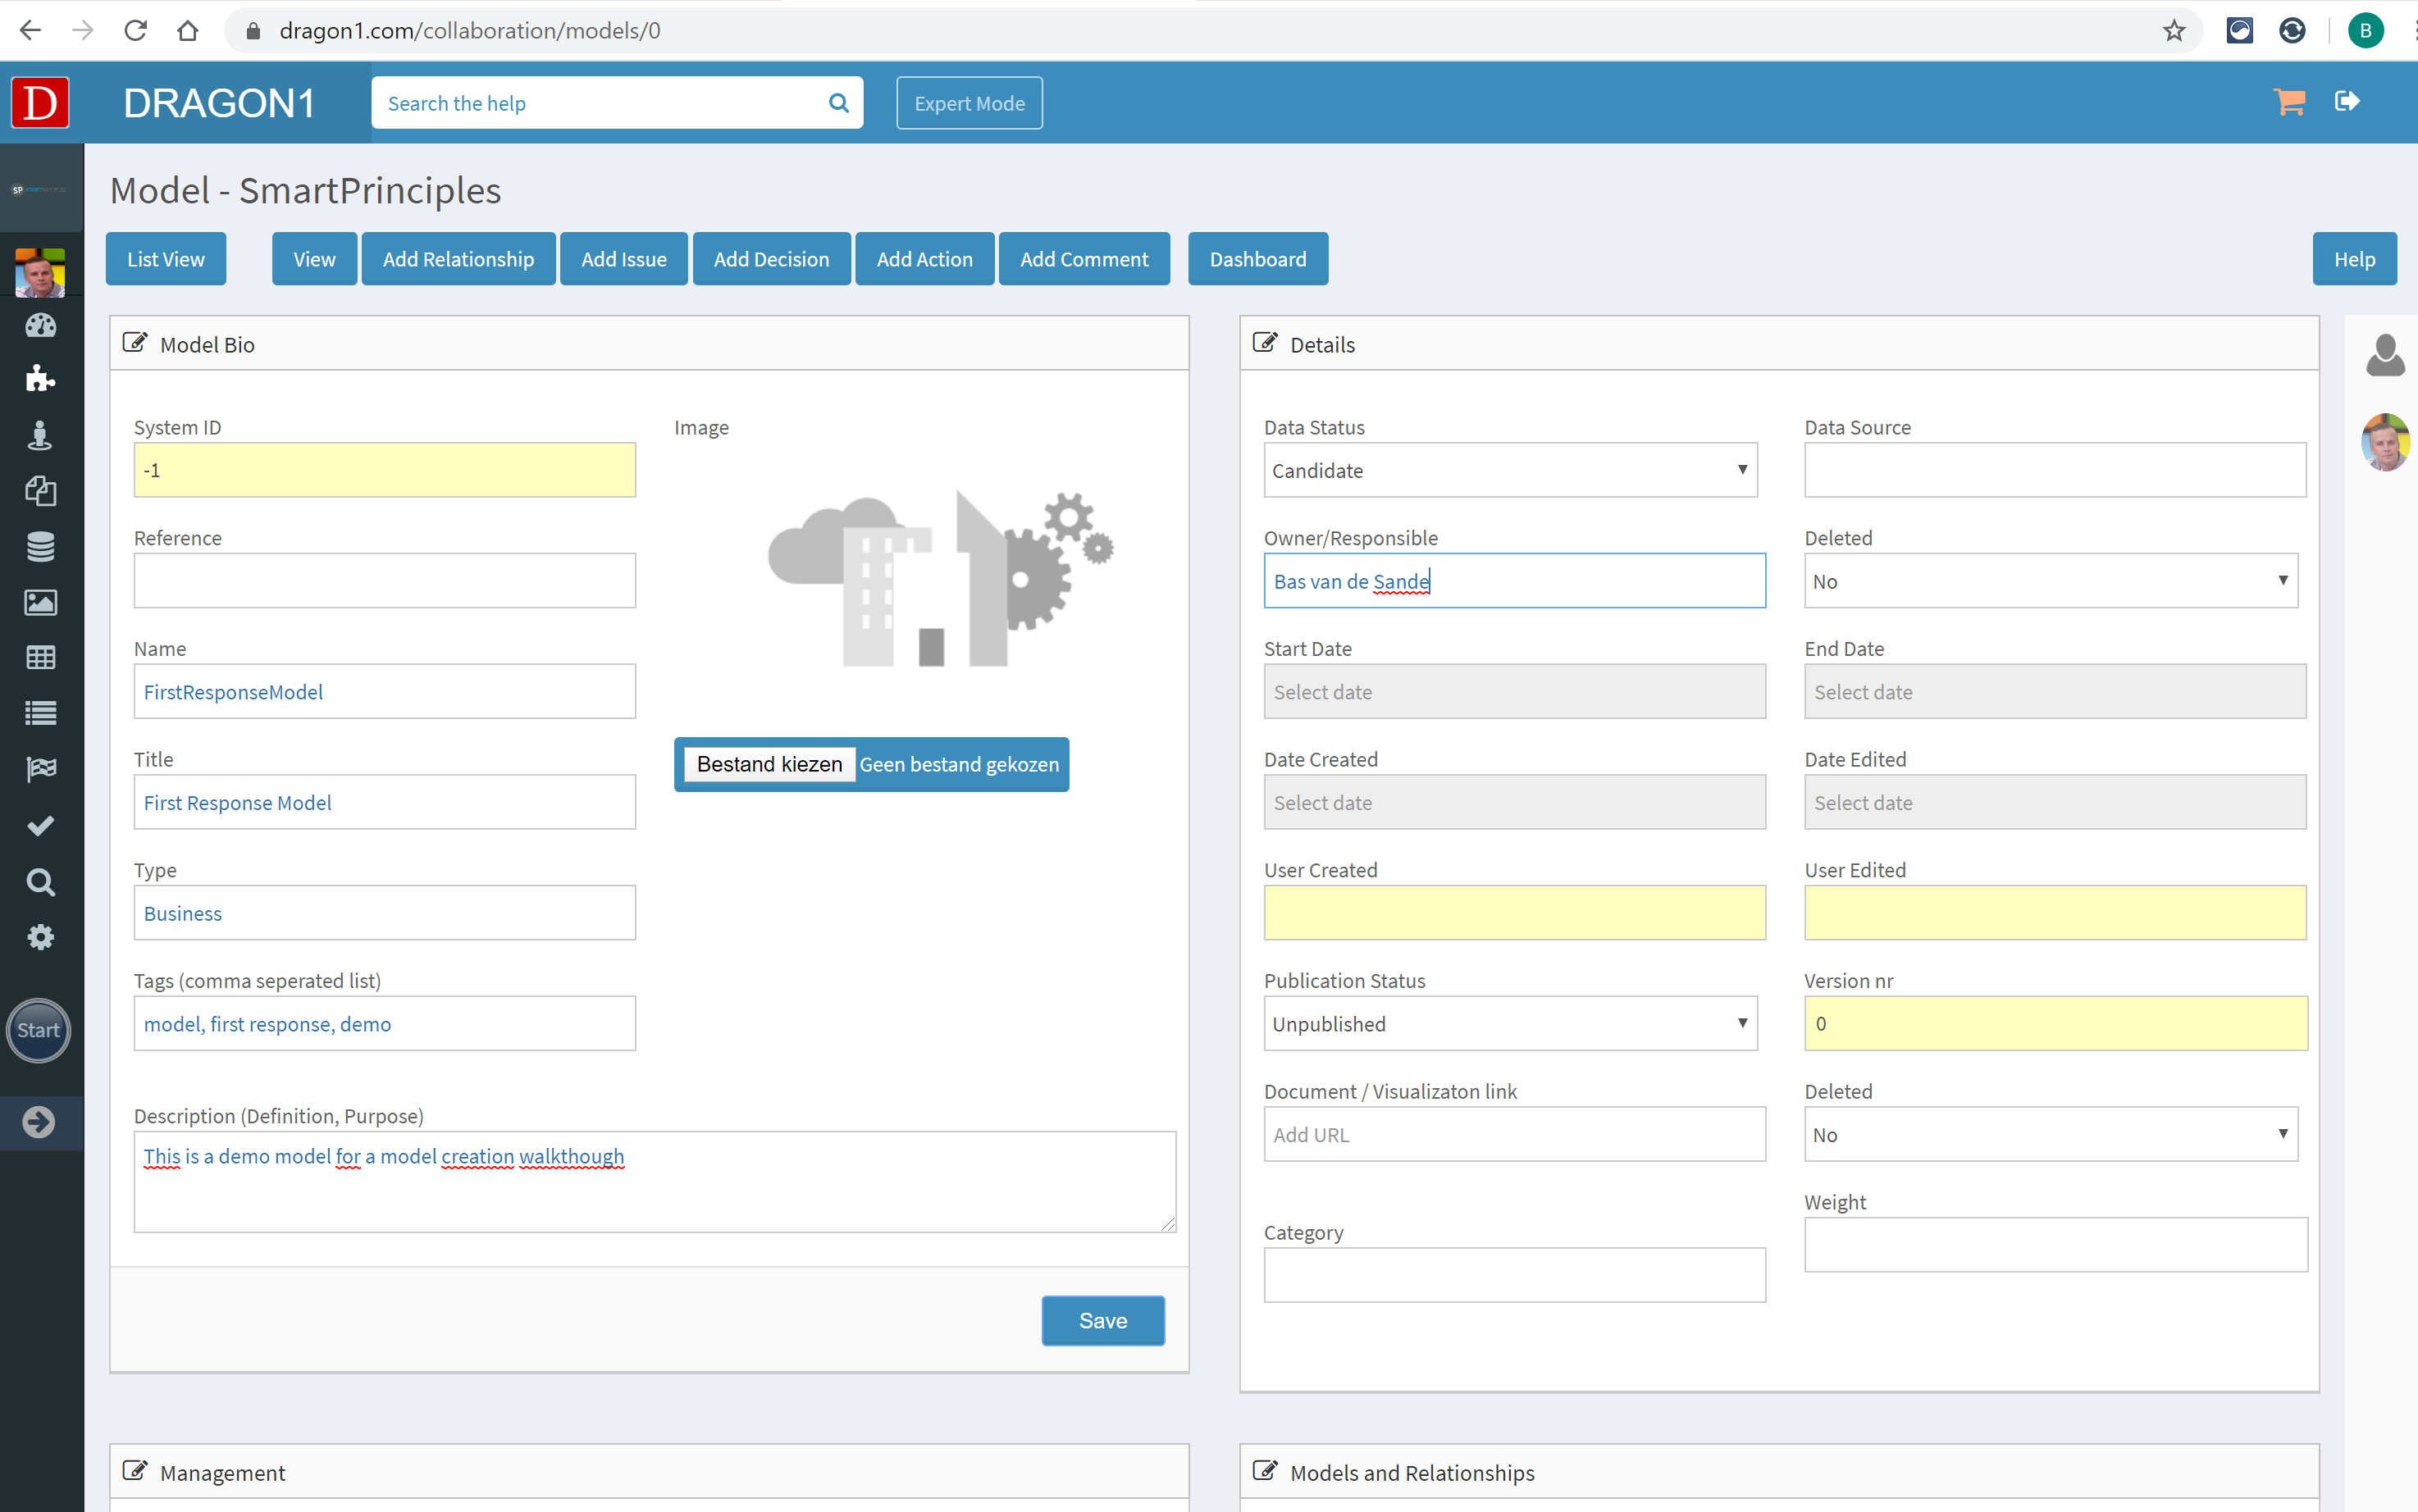
Fill in the details and press 'Save'.
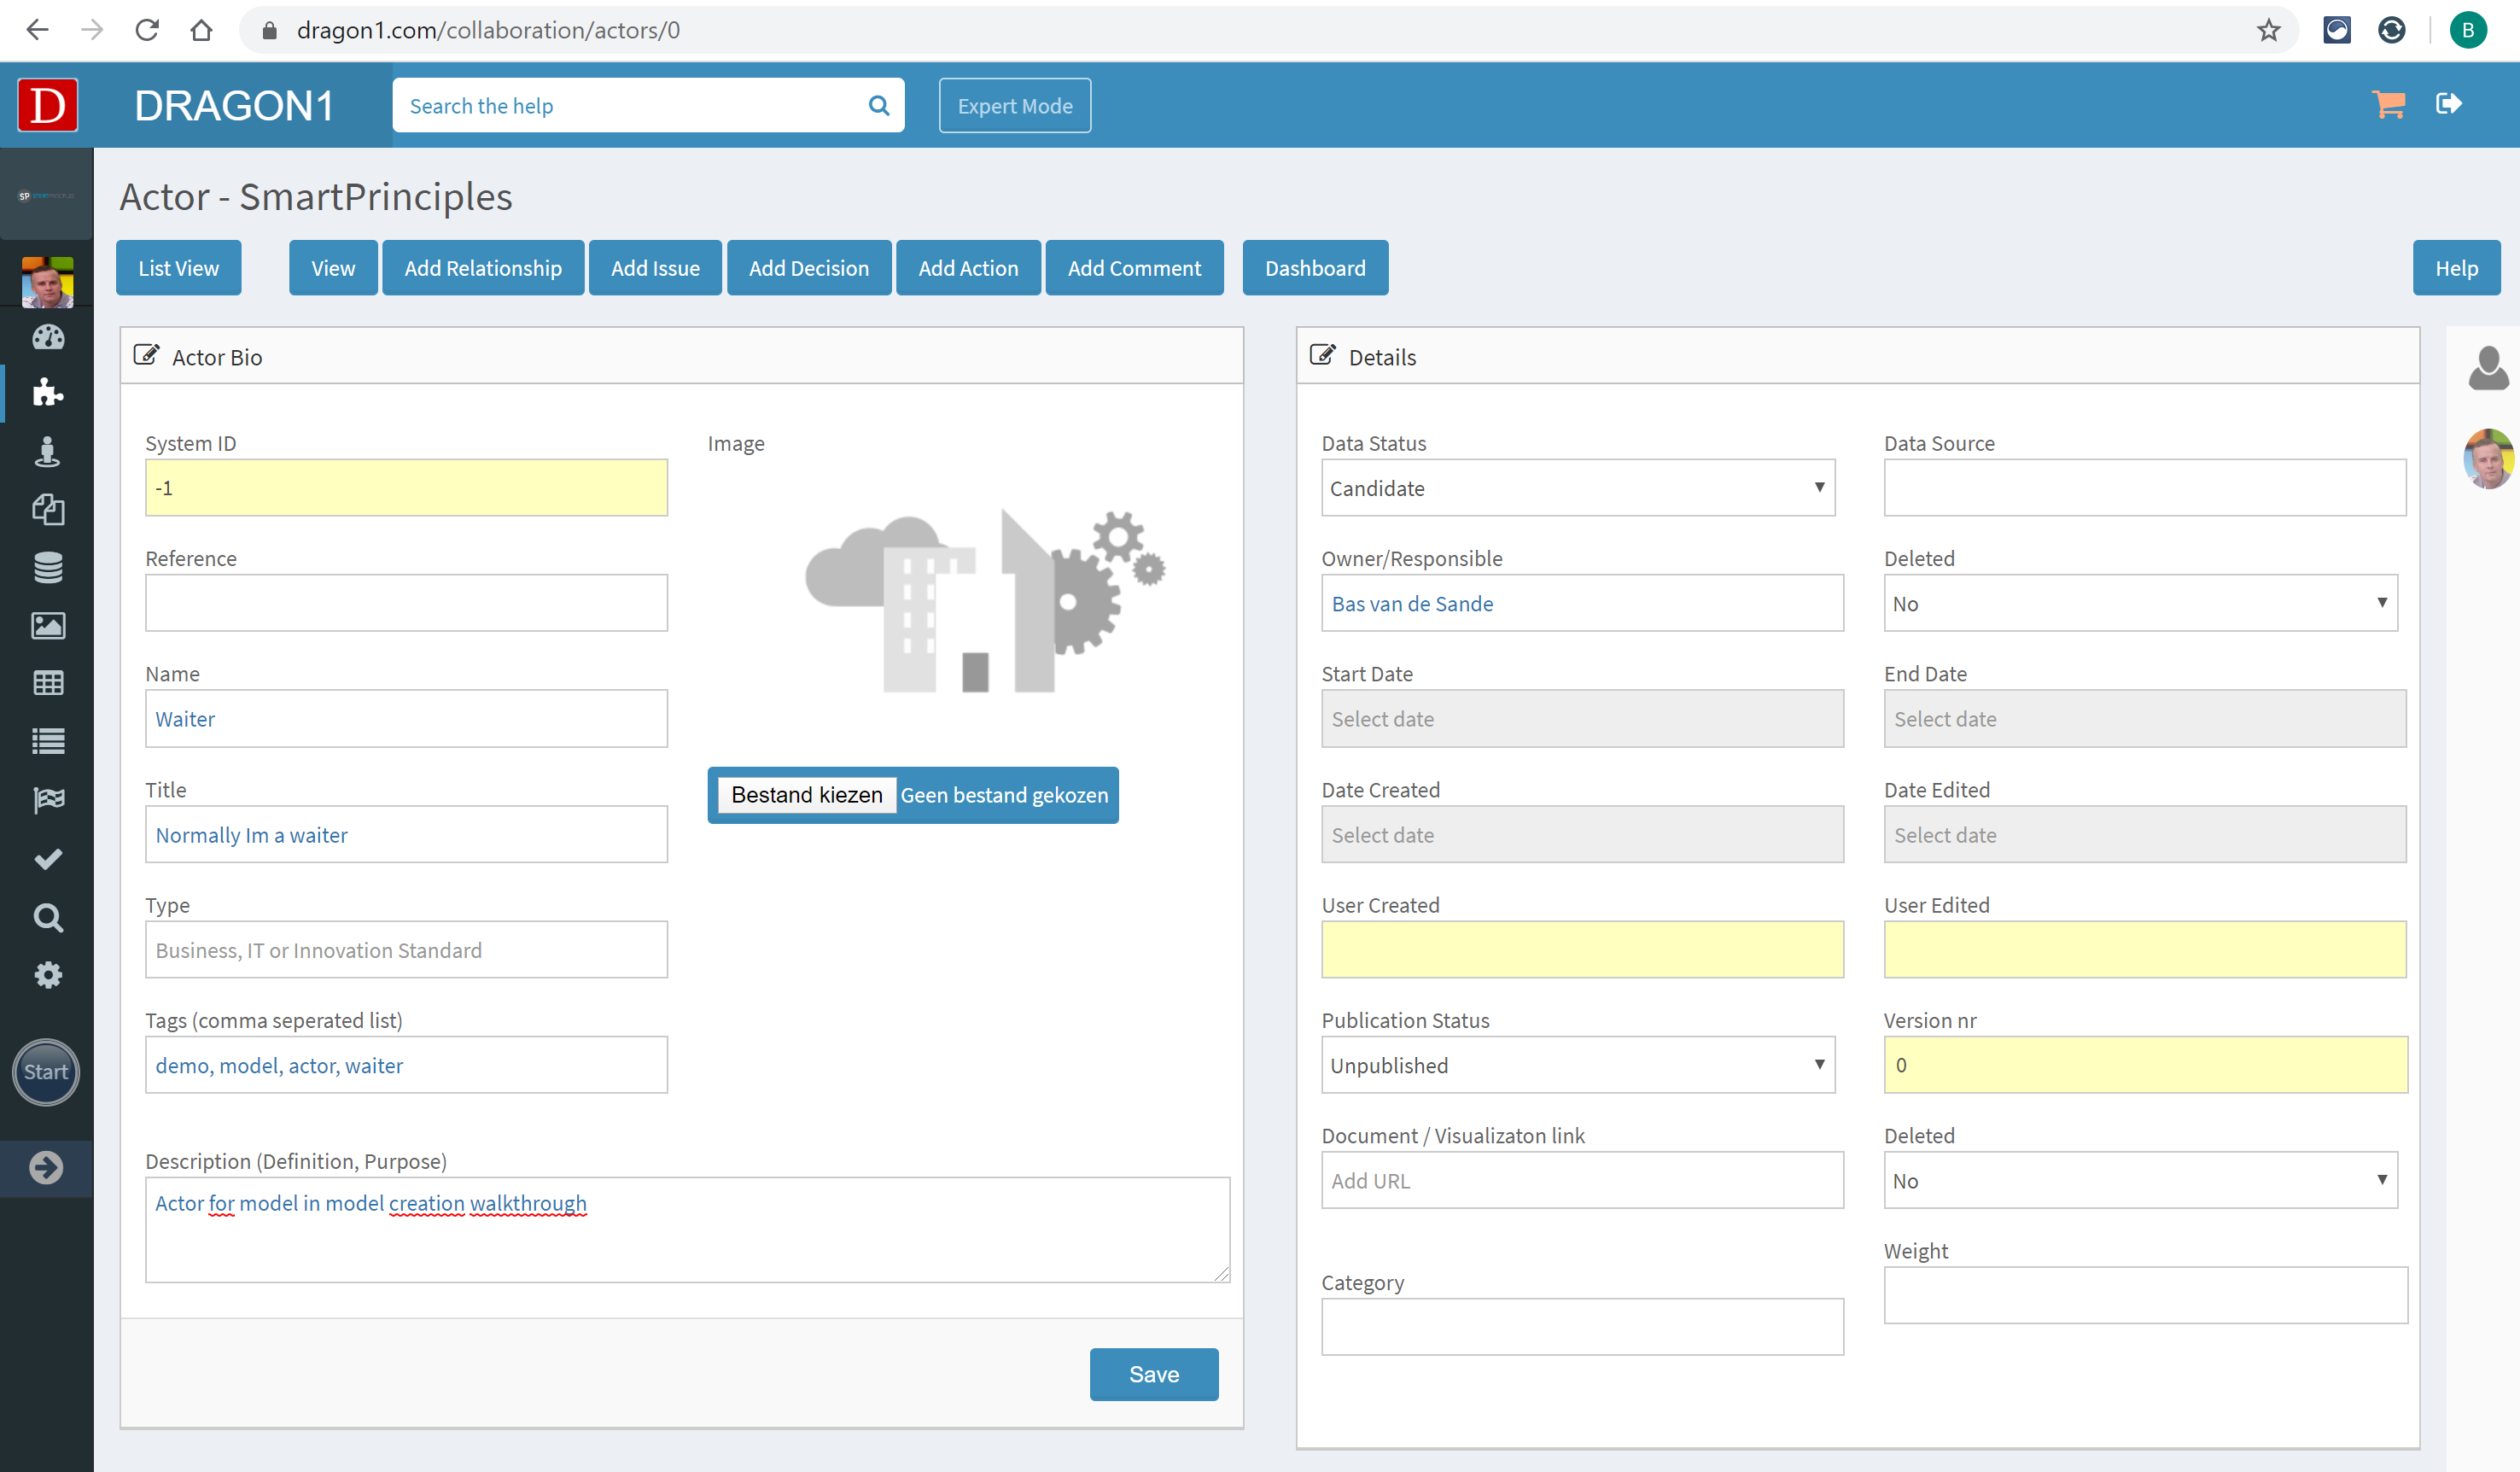
Step 2: Add an Actor
Using the Data Dashboard, navigate to Actors and click the 'Add' button. Fill in the details and press 'Save'.
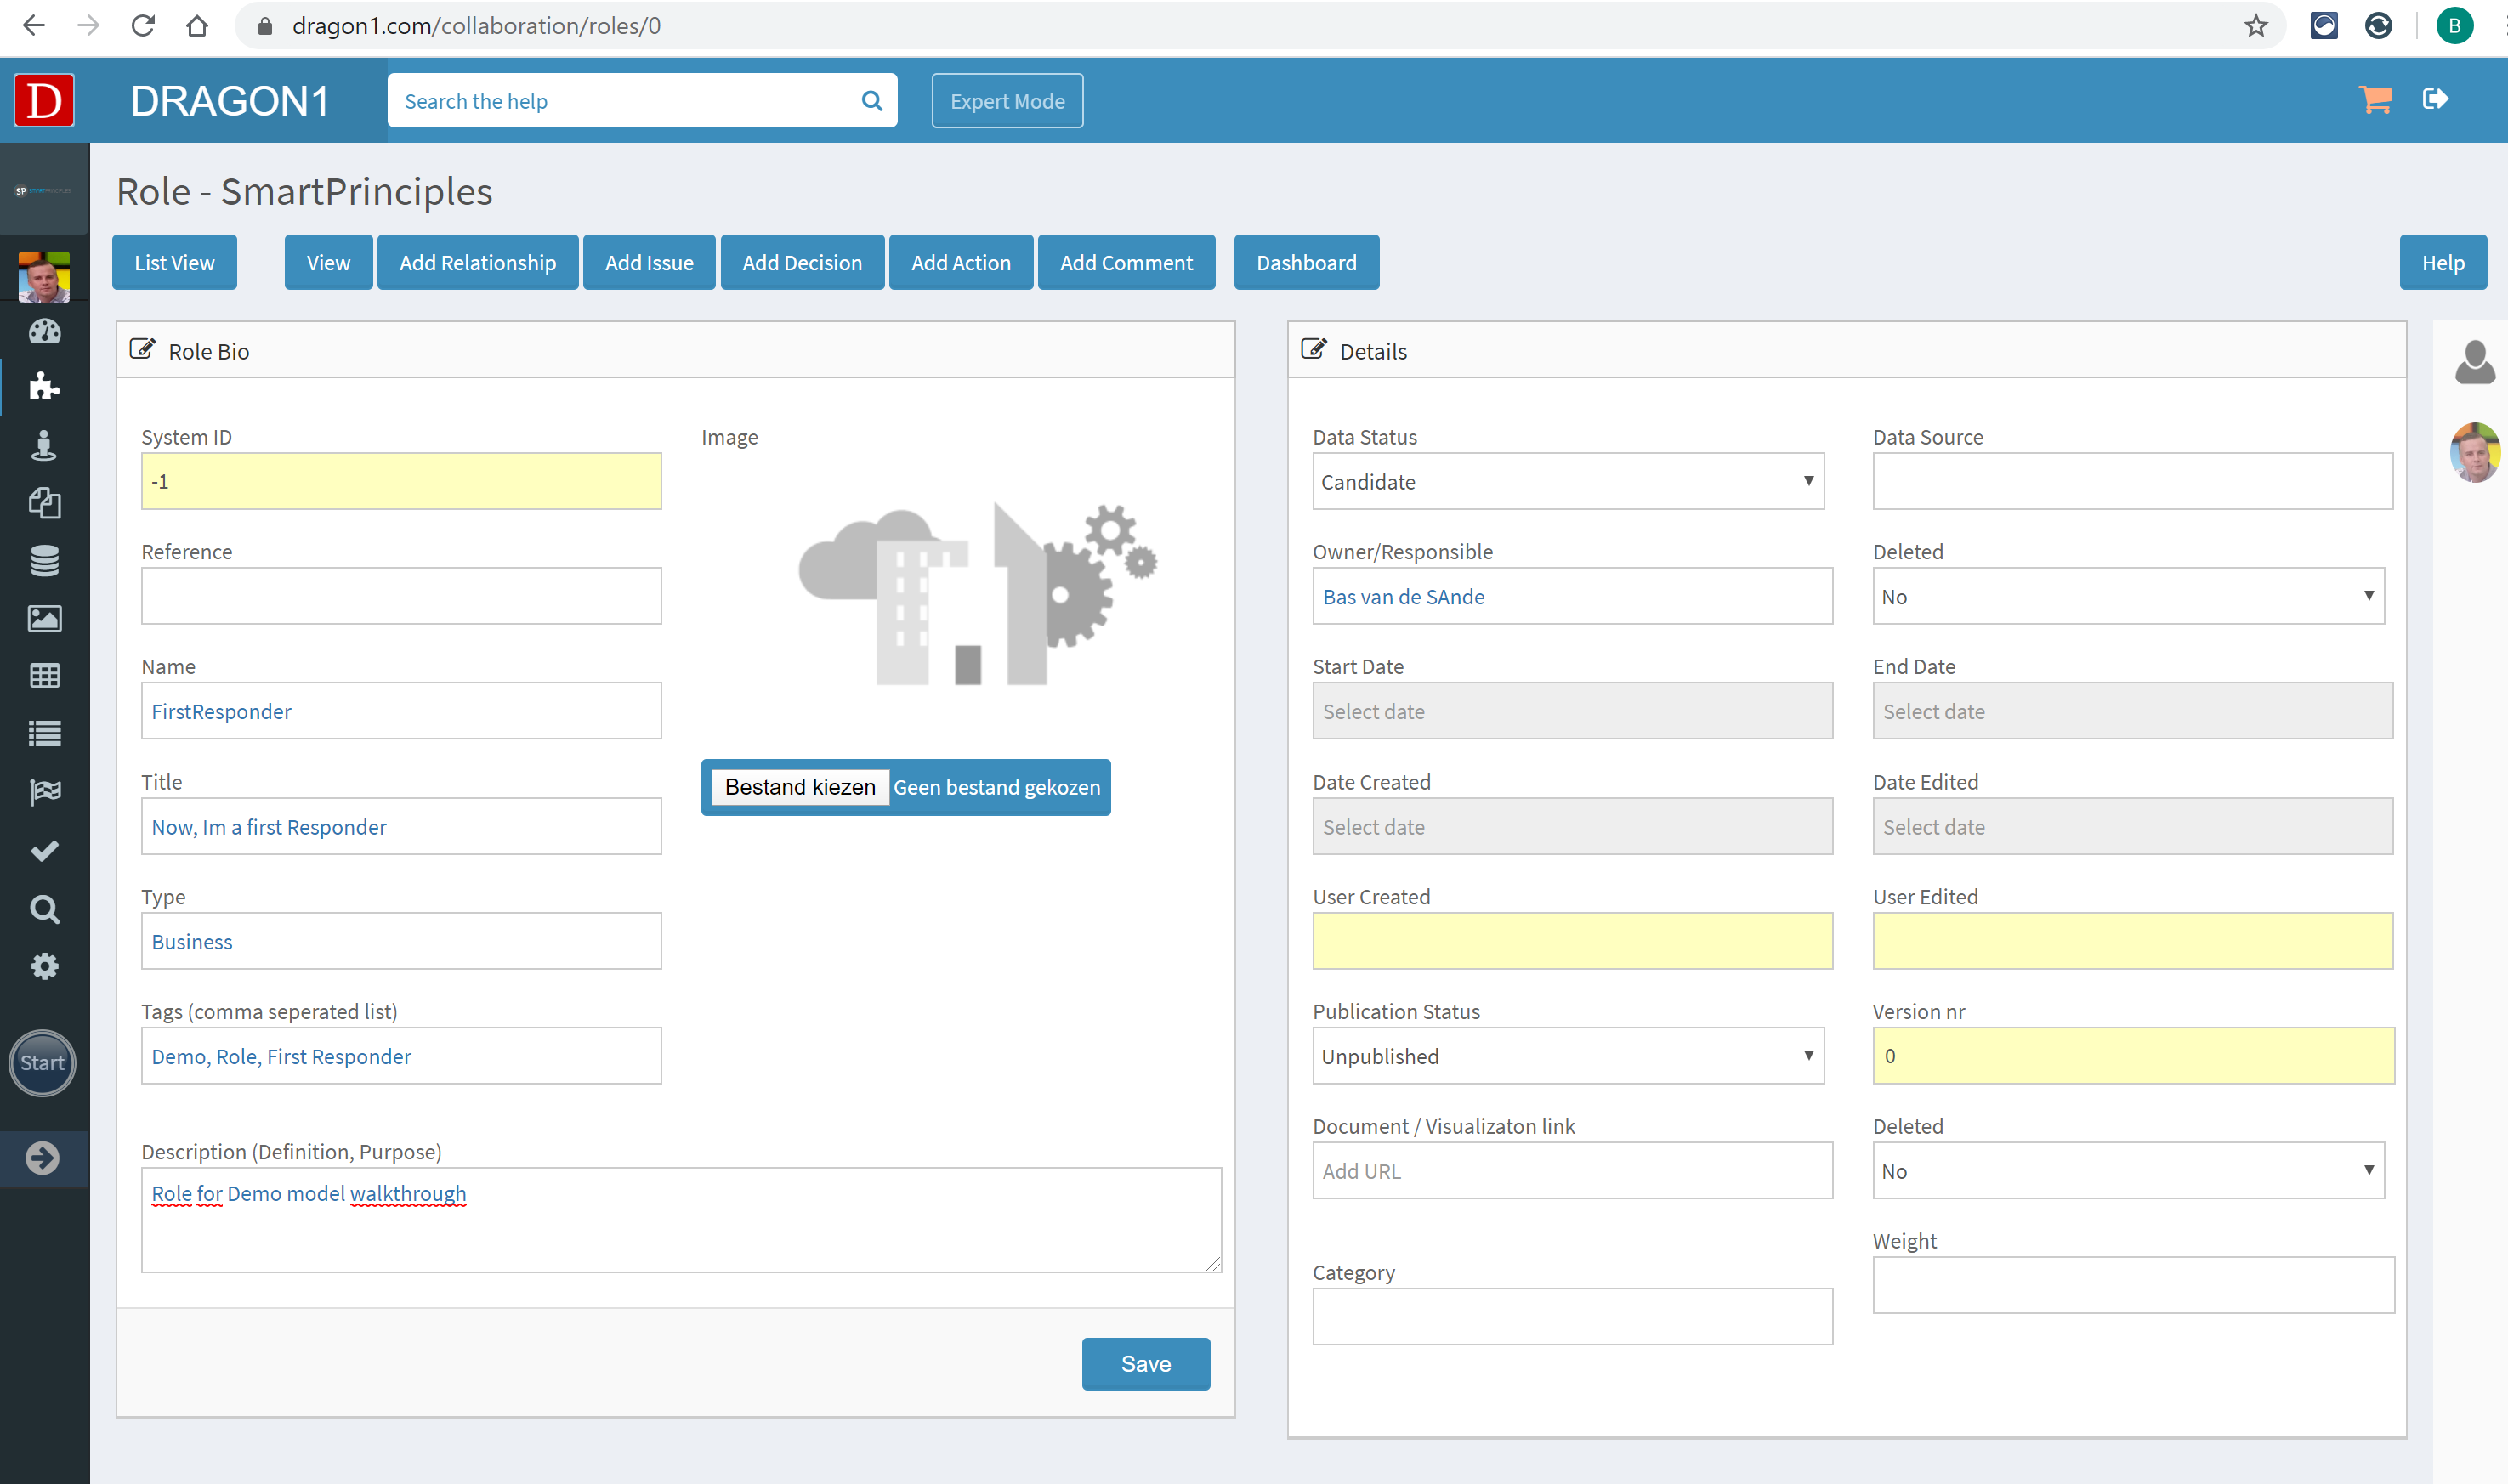
Step 3: Add a Role
Using the Data Dashboard, navigate to Roles and click the 'Add' button. Fill in the details and press 'Save'.
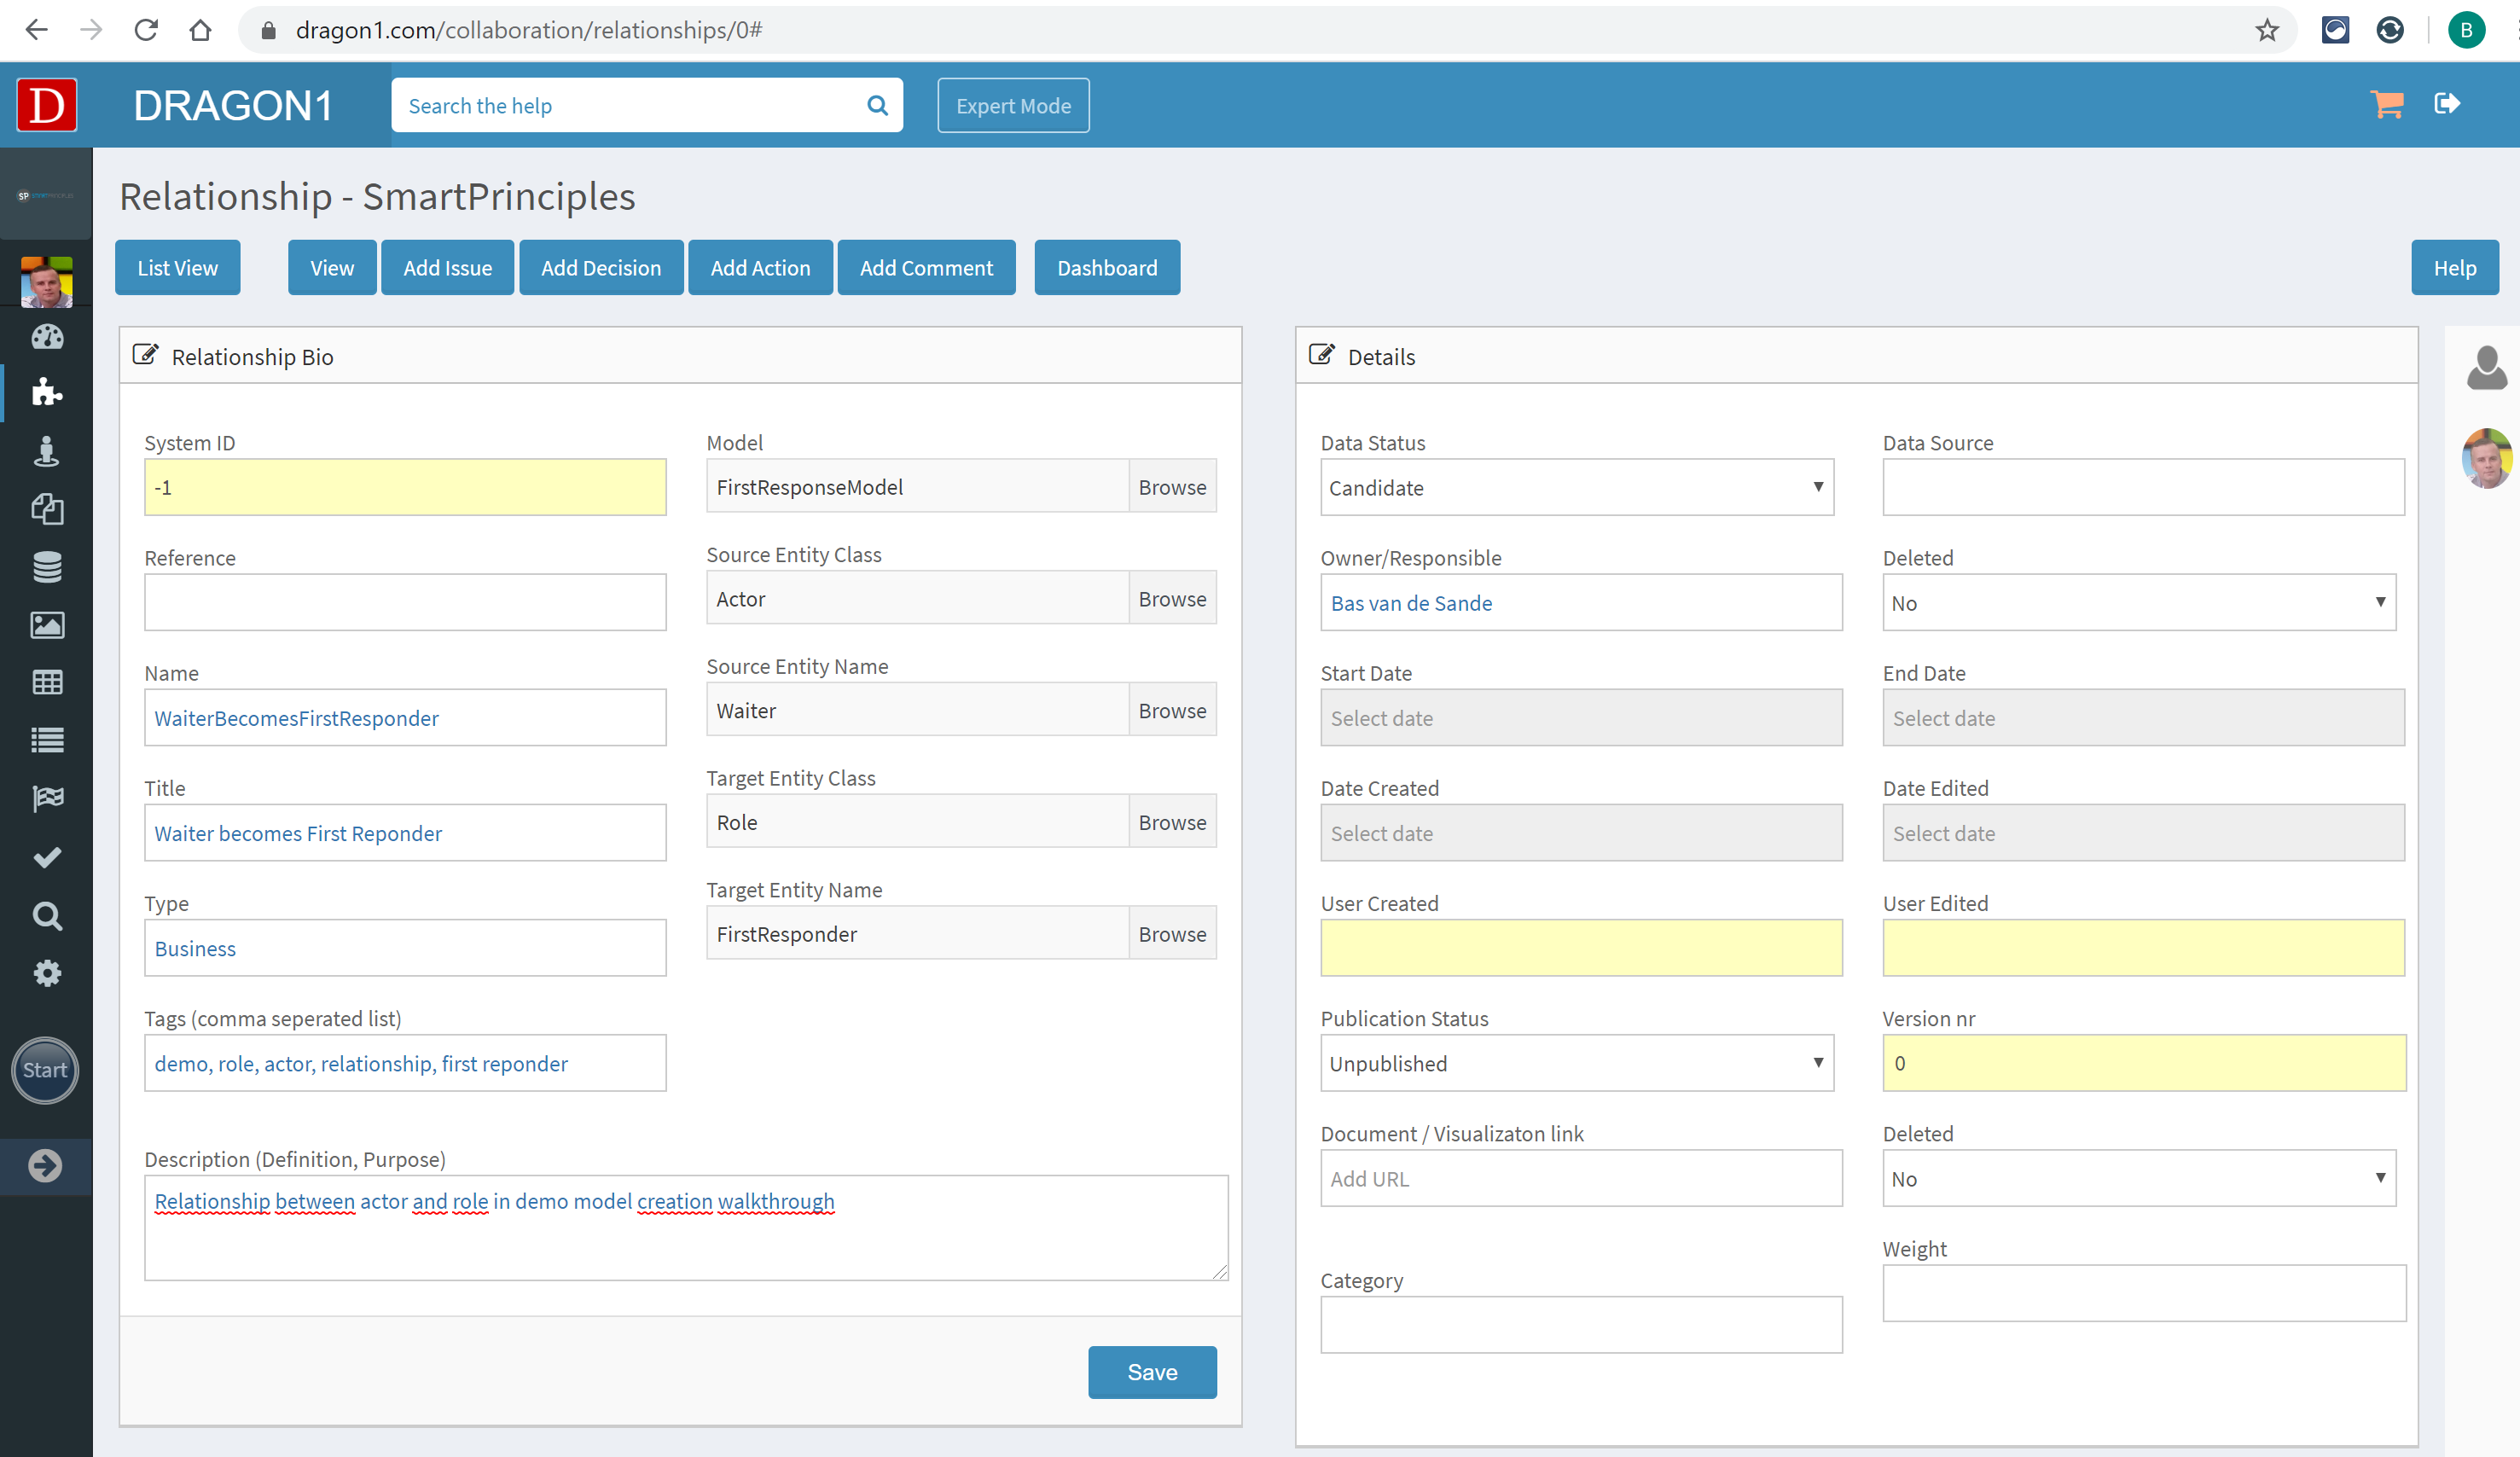
Step 4: Create a Relationship
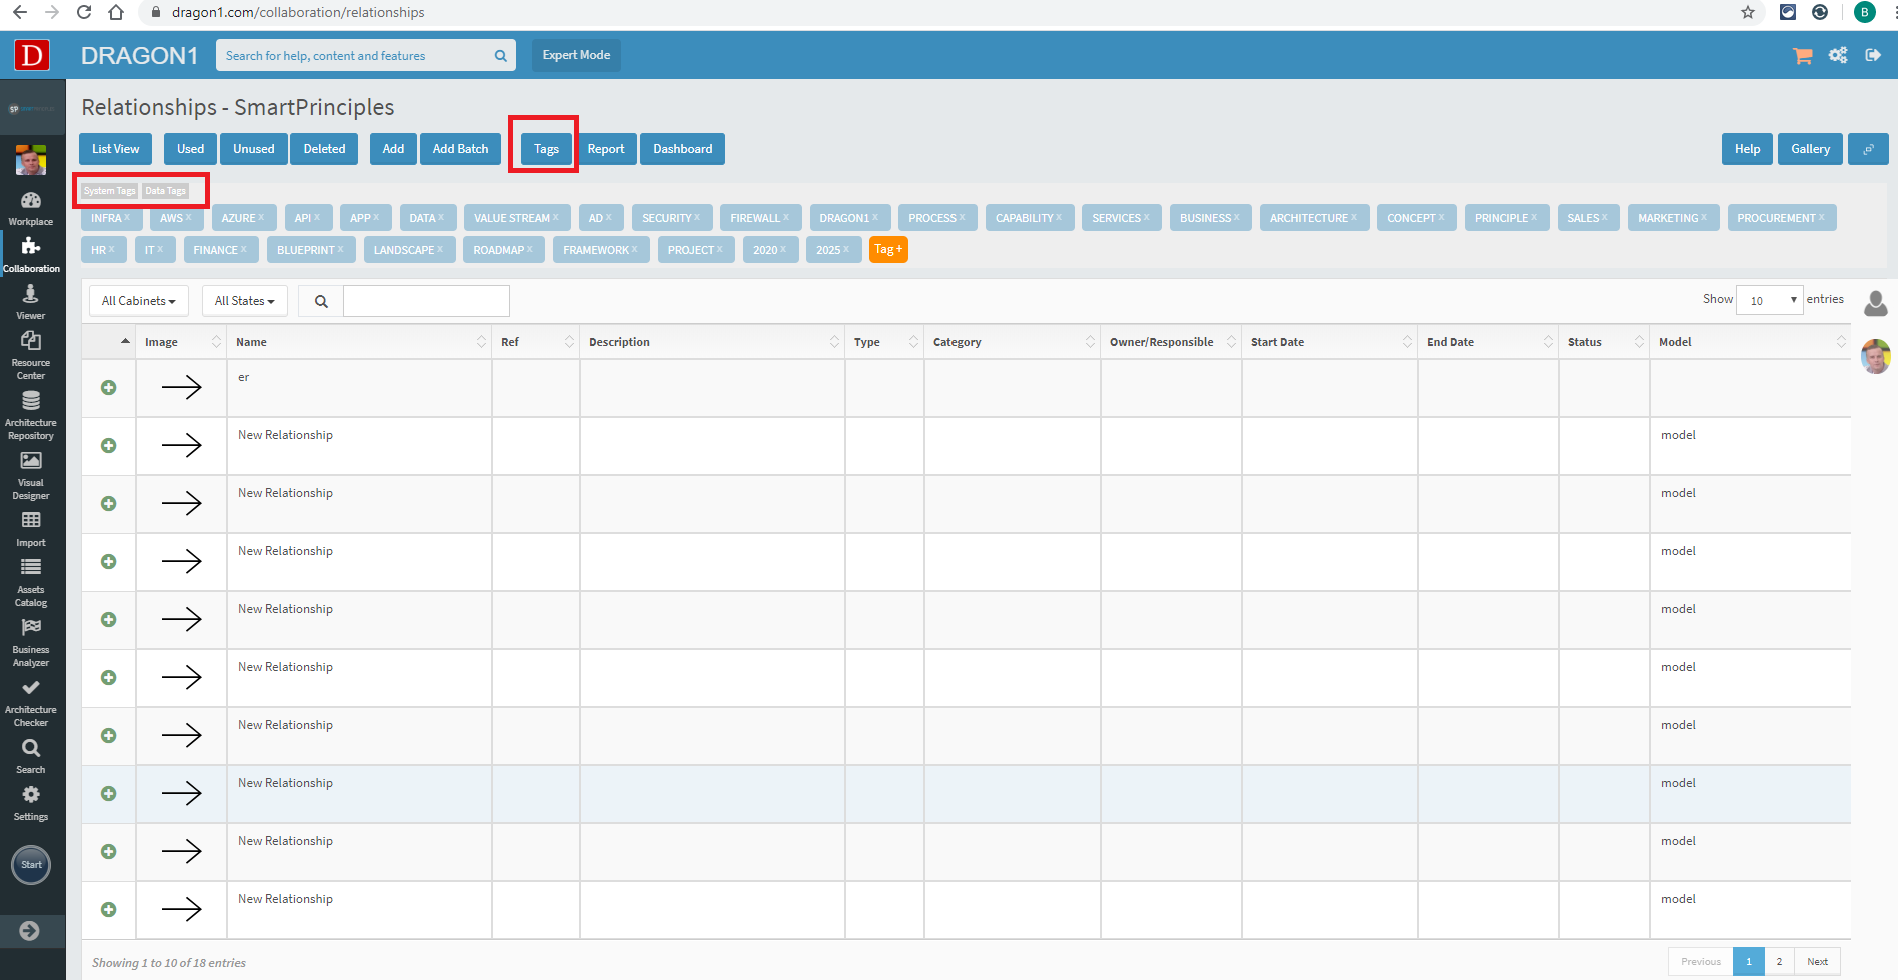
Using the Data Dashboard, navigate to Relationships and click the 'Add' button. Fill in the details, and choose the model, the source, and the target Entity Classes. In this case, the source Entity Class is Actors::Waiter, and the target Entity Class Roles::FirstResponder. Finally, press 'Save'.
Step 5: View the Model Diagram in the Viewer
When returning to the Model (via the Data Dashboard), there is only one step left to view the Model Diagram.
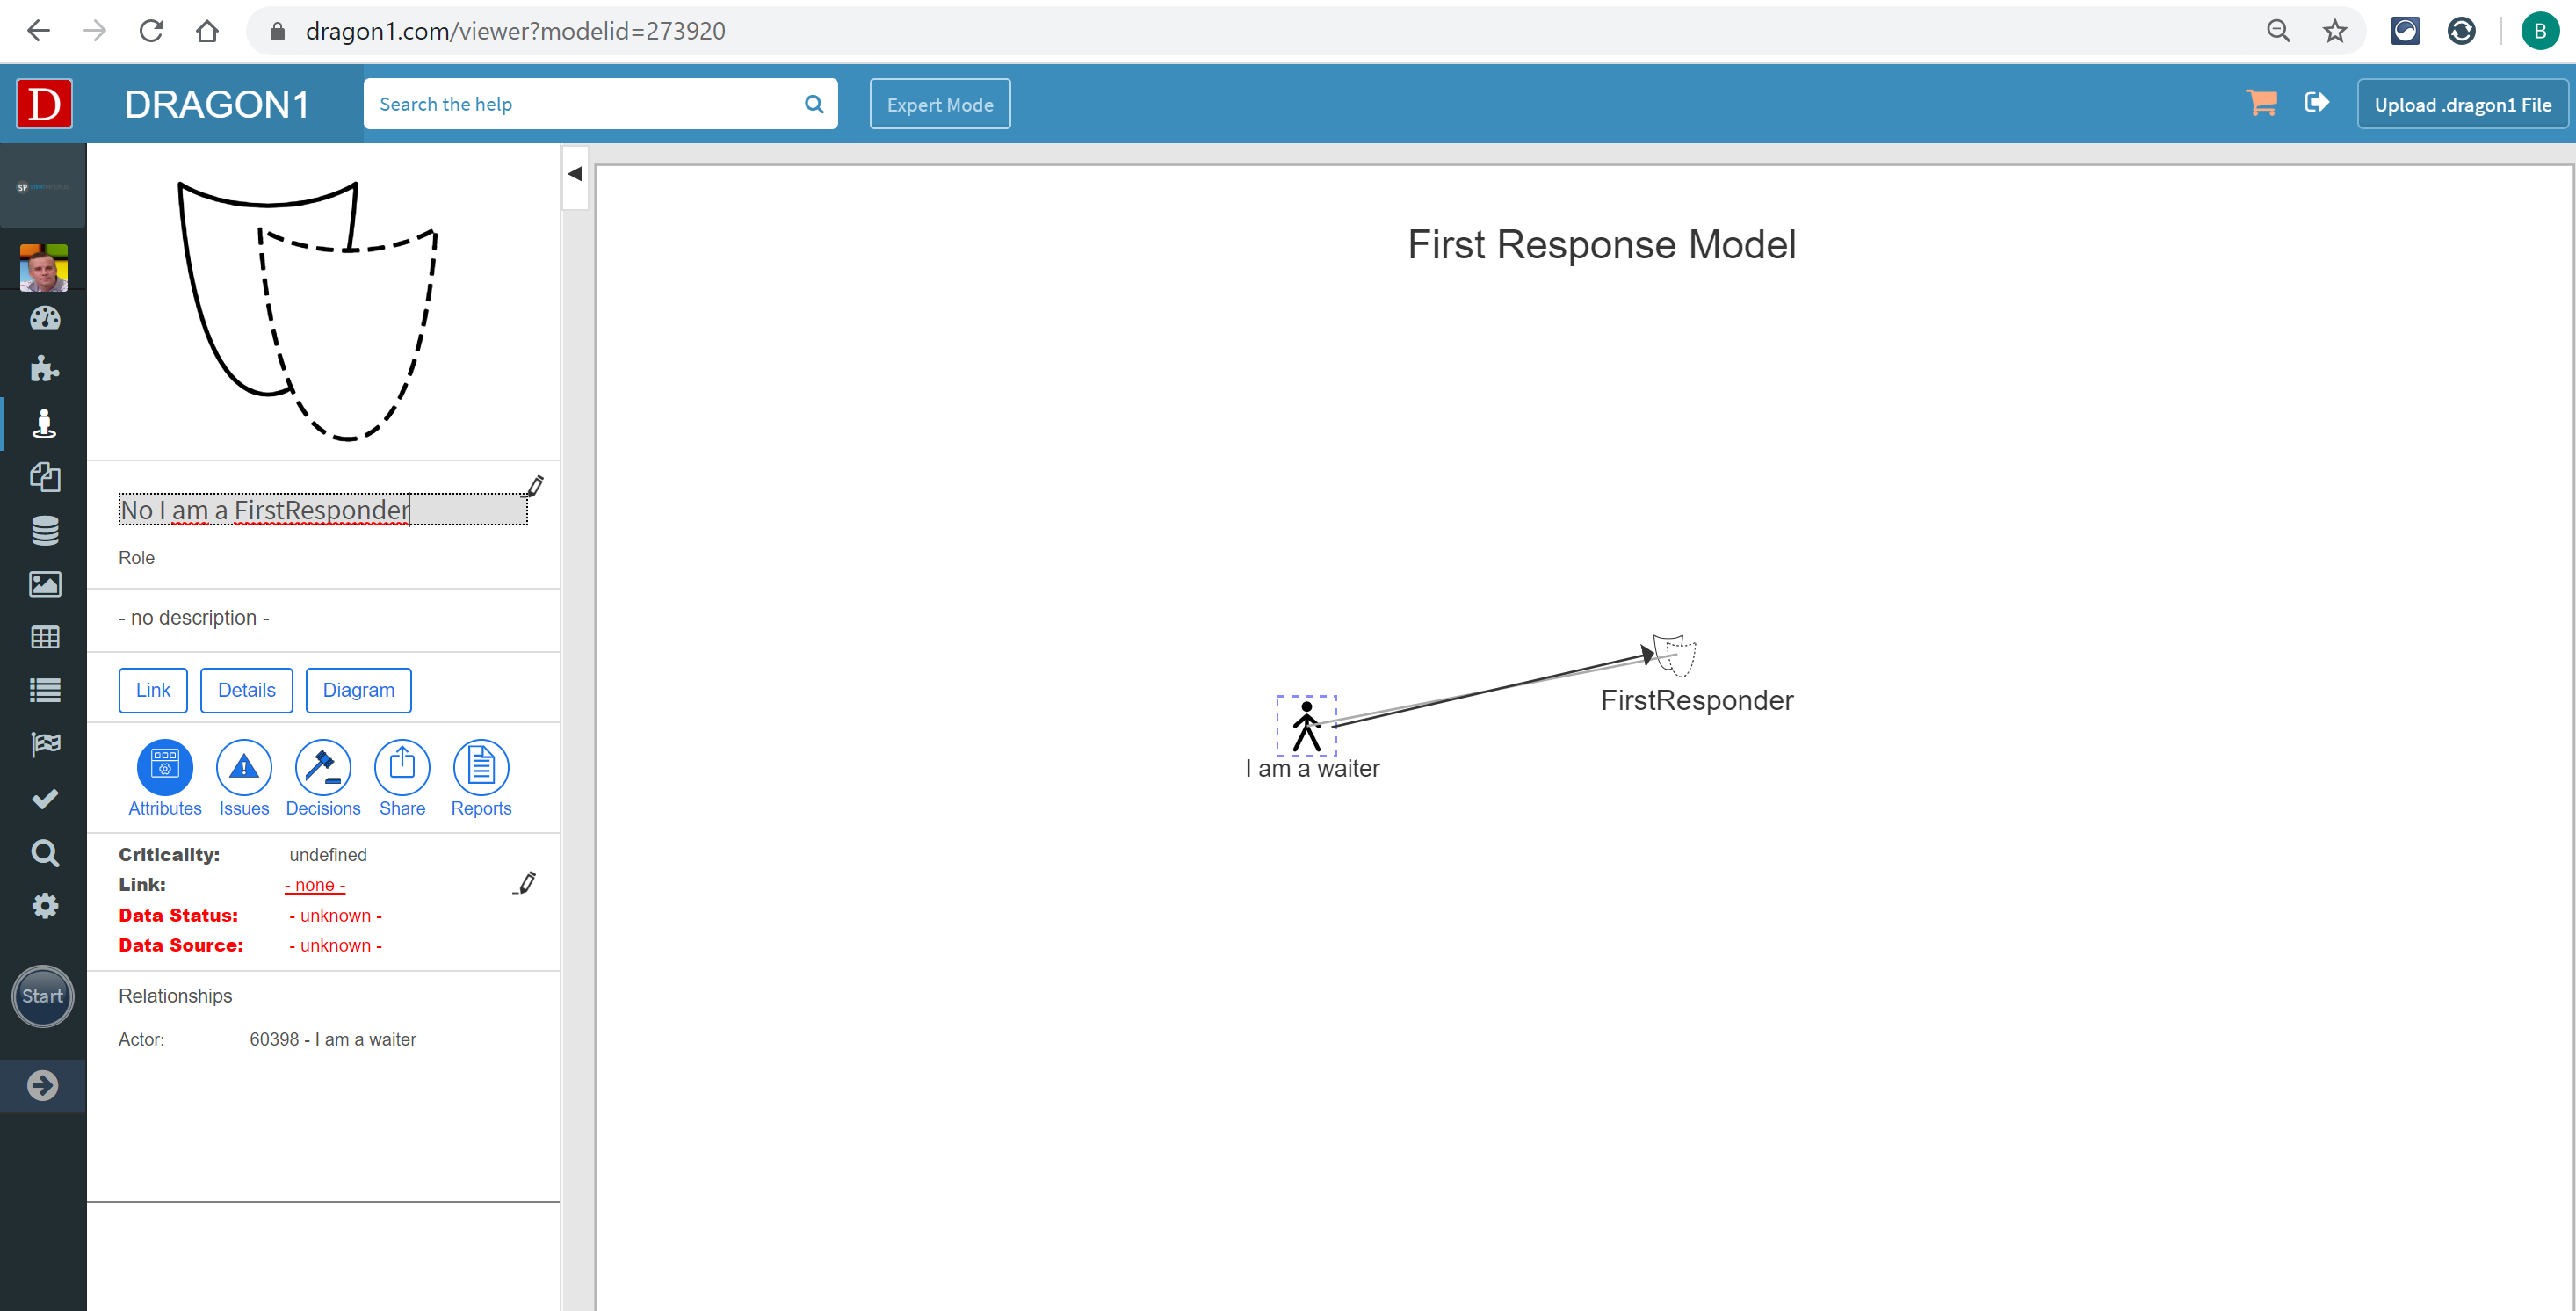
Press the 'View Model' button, and the Viewer will show up with the Model created in the above steps. In the Viewer, the displayed names can be changed by clicking the name (the detail pane shows up with a text edit option).
Method 2: Use the Repository (Classic)
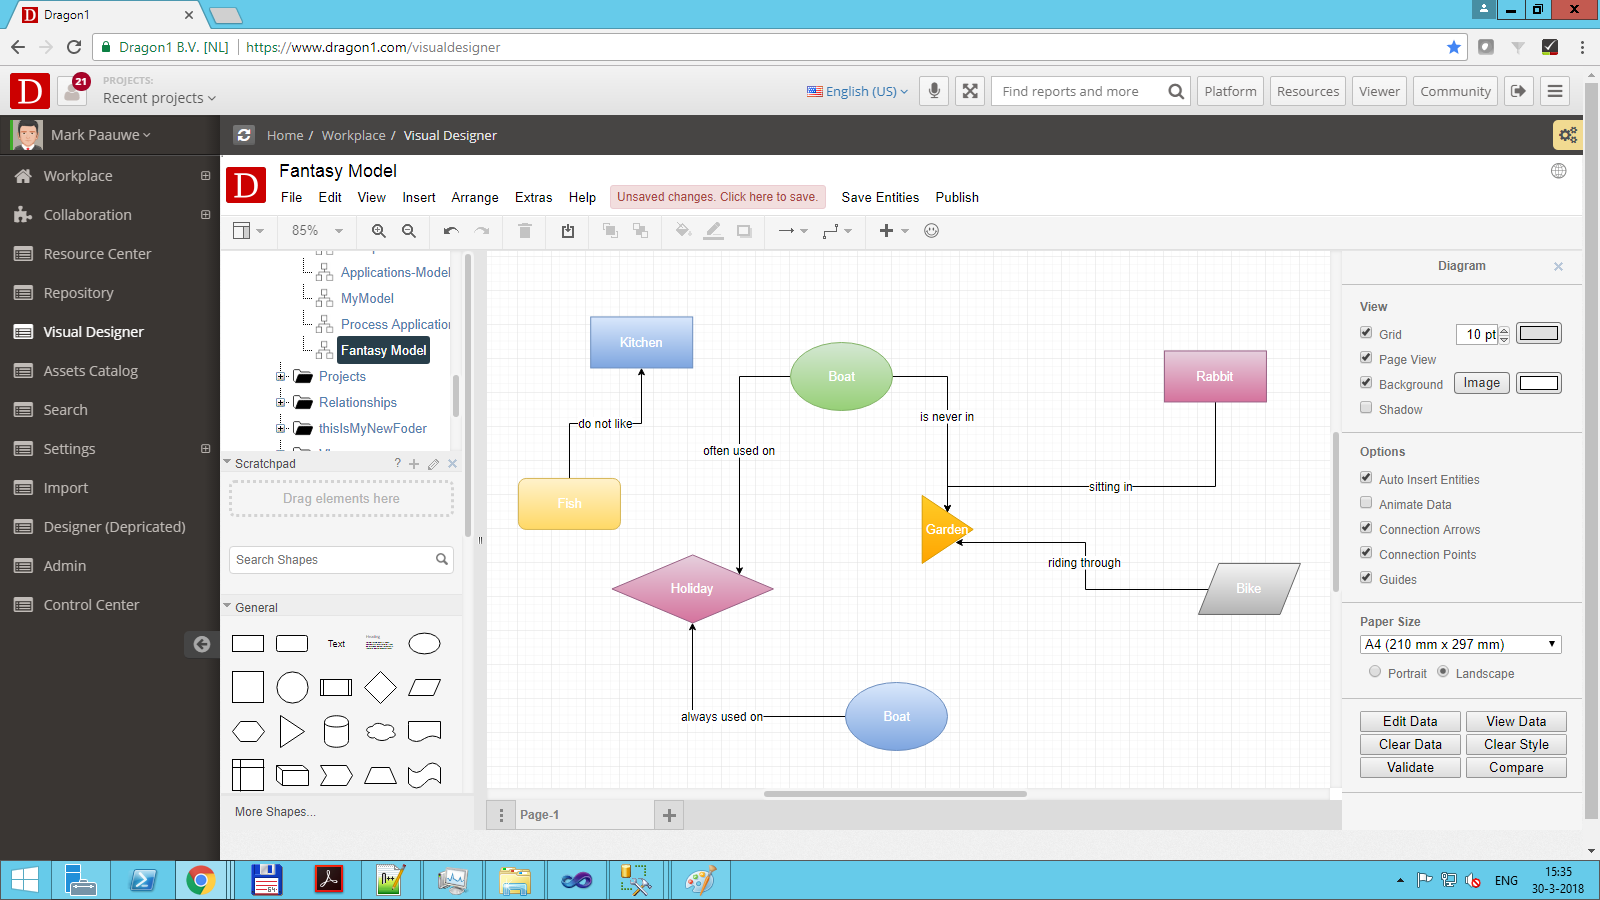
This section shows the classic way of creating a Model in Dragon1. For this tutorial, the Dragon1 Fantasy Model is being used
Dragon1 Fantasy Model
Every model should have a title, so this Dragon1 fantasy model is called 'Ordinary Life'. The model shows things many of us encounter daily. The model also shows relationships between entities that tell us something. For instance, constraints or impact of change.
So what does this model tell us? This model tells us that rabbits and boats will never meet, but there is still a danger for rabbits in the garden because people ride their bikes there. And if the relationships are correct, the Bike and the Rabbit are never taken on a Holiday or put in the Car.
Know this is one of the solid points of a model. You can create a common insight and overview in seconds with a group of people looking at the model. With the model, you can communicate direct and indirect relationships between entities. Depending on the concerns, interests, and knowledge of a person looking at the model, that person will interpret it differently and make different choices and take different decisions based on the model.
Generating a Model
The fastest and easiest way of creating a model is by generation. Below, you see a model specification in the Dragon1 Modeling Language
[{"class":"model", "id":"1", "name":"enterprise model","enterprise"},
{"class":"product", } ]
Download this .dragon1 File, edit it in Notepad, and view it in the viewer, and you have a model.
About Creating A Model
Creating a model is not just creating a diagram or a big visualization.
In modeling, a shape (or symbol) has a contextual, syntactic, and semantic meaning; therefore, it is an entity class or entity. It has the meaning that a modeling language or you give it.
By relating entities, you create a model. With a model, you create a simplified representation of the world to communicate about it.
For this reason, we have chosen that in a model, by default, a shape has its name below the shape.
The name is shown if a shape does not have a title. If a shape does not have a name, nothing is shown. If a shape has a title, the title is shown. Titles are likely to change more often than names.
If you are, for example, going to create a business model, you need to think of products, services, market segments, stakeholders, clients, processes, and more. For all these real-world entities, we have shapes you can choose from.
By selecting the shapes, relating them, and giving them correct names, you can create your own (business) model.
Create a Model Entity
To create a model entity:
- Open a cabinet.
- Select a folder.
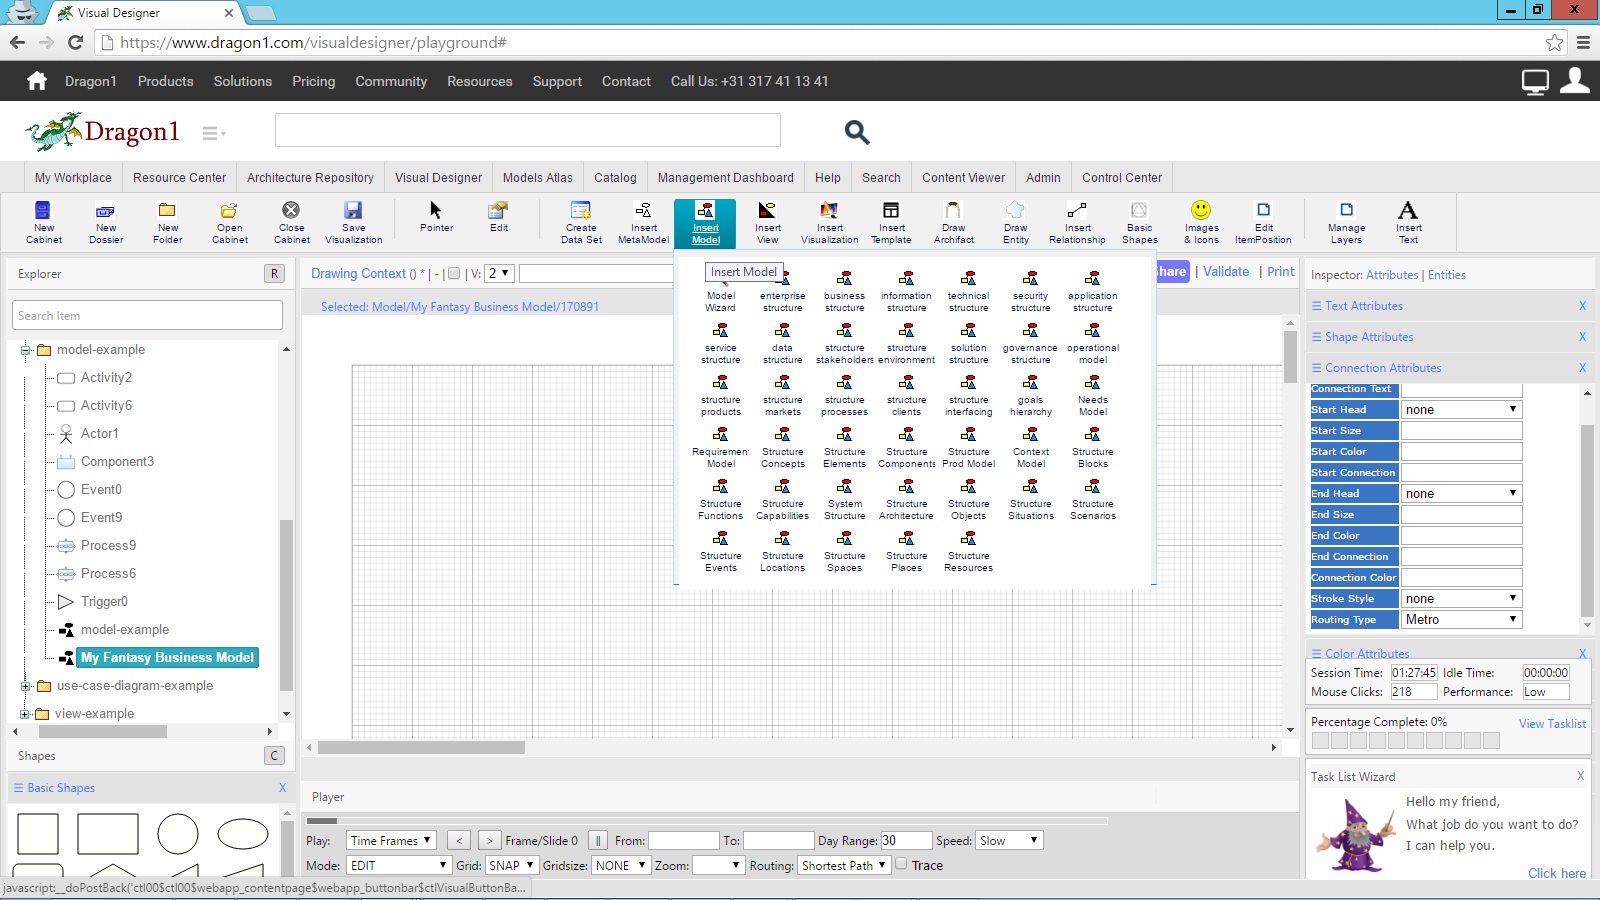
- Click Insert Model on the button bar (later on, you can select a model type).
- The New Edit dialog appears. Enter a name for the model.
- Click OK.
You now see that the model entity is inserted in the folder of the cabinet (that is what we call the users who created Dragon1 repositories).
Drag Shapes onto the Canvas from the Shapes Panel
A model is a set of related entities. So, we need to add entities to the canvas.
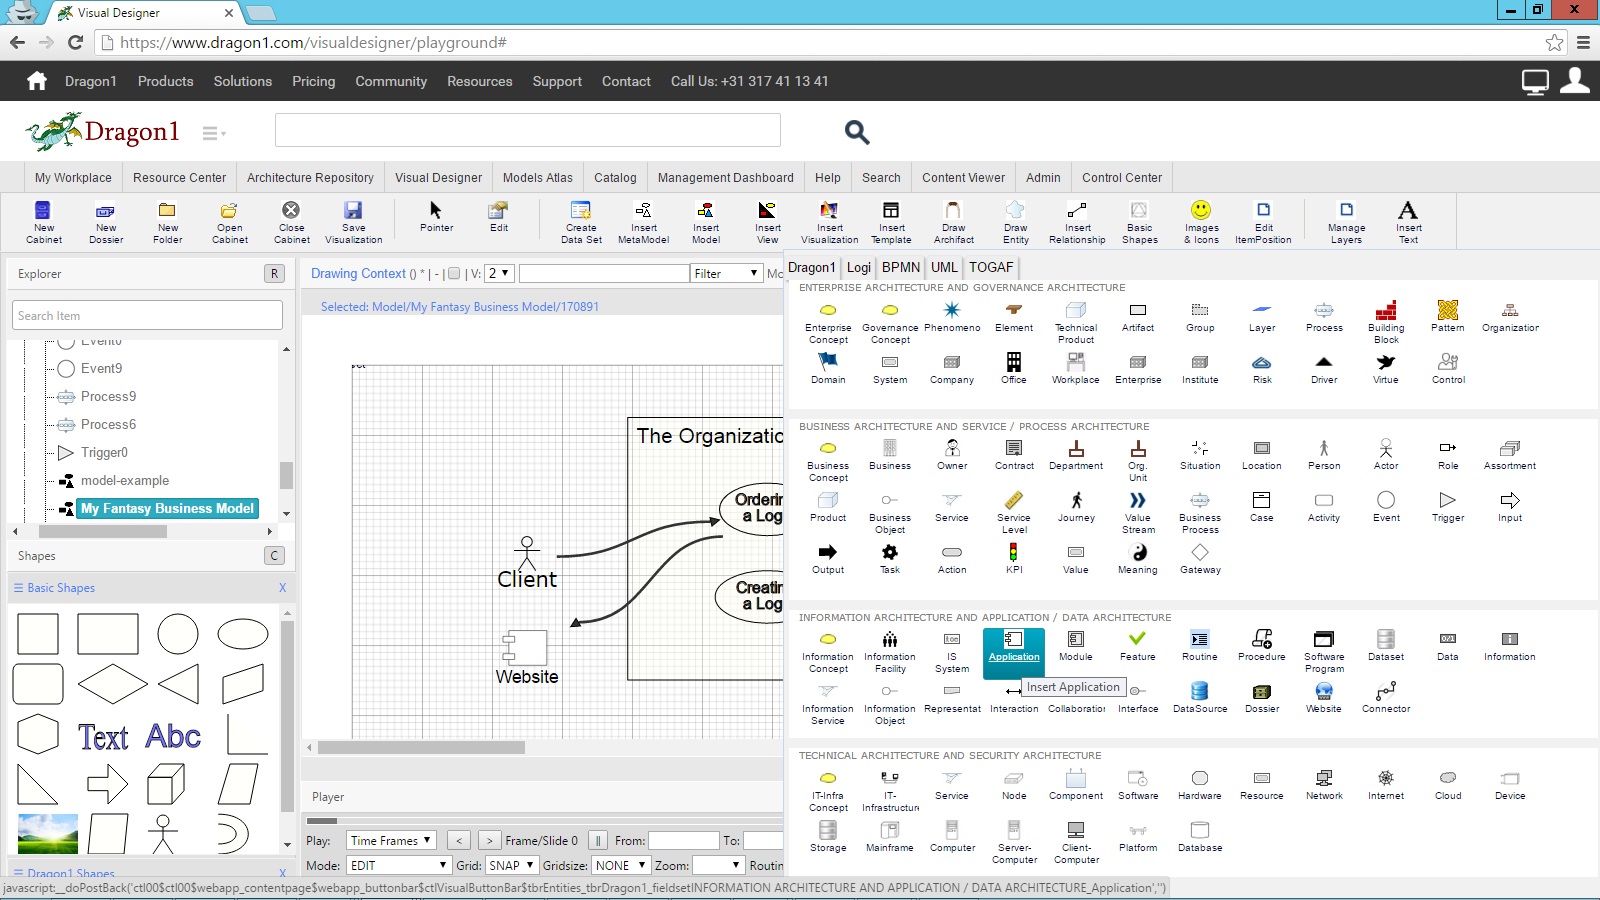
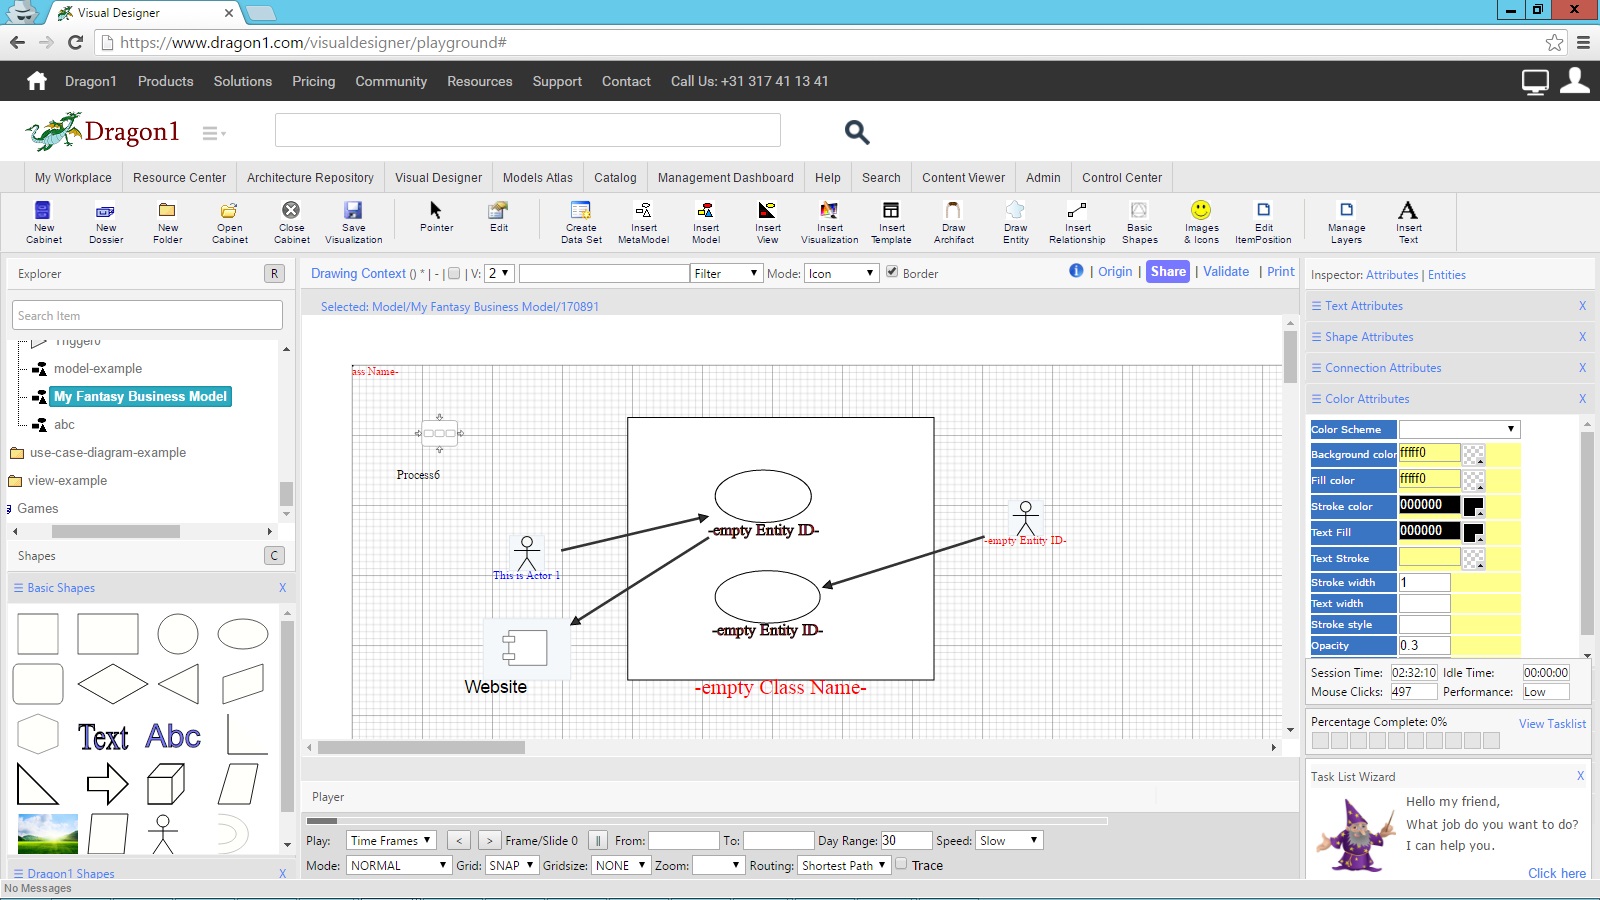
There are three ways to enter entities on the canvas: By dragging from the shapes panel, by dragging from the Explorer Treeview, and by inserting from the button bar (Draw Archifact and Draw Entity).
To add entities to the model:
- Select a model entity in your folder. You now have a model canvas at your disposal.
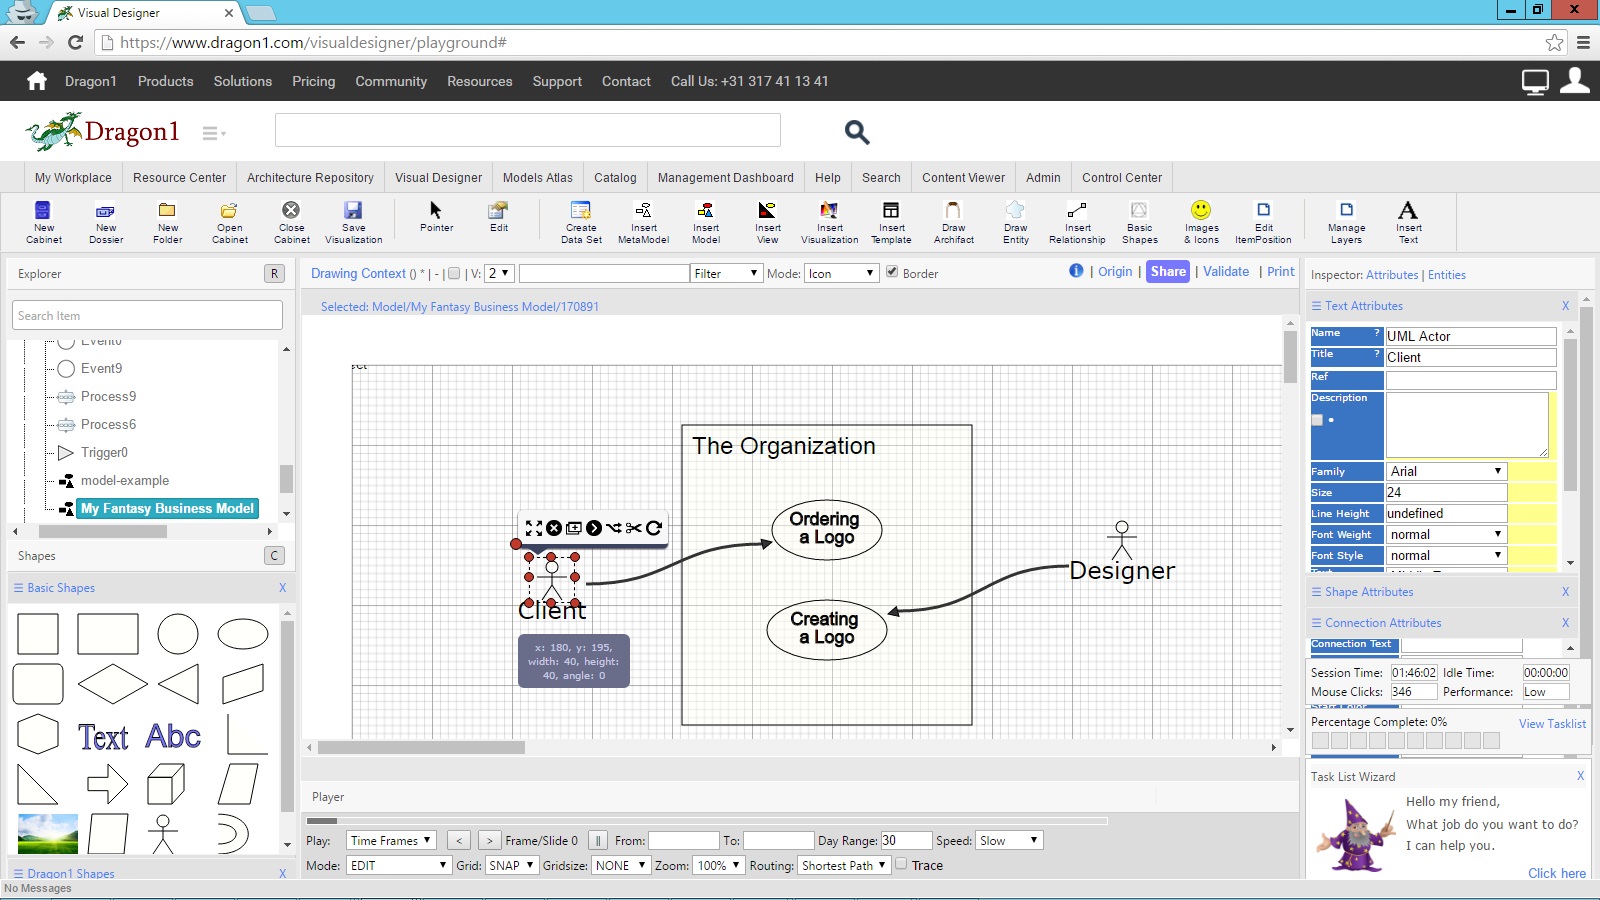
- Drag a basic shape, for instance, the ellipse (a use case), to the canvas.
- Depending on your settings, you are now asked if this entity needs to be added to the repository. (You see the entity added in the treeview).
- Switch the setting in your Default Settings (via My Workplace), drag a basic shape, for instance, the actor, and see the difference. (For example, the entity is added automatically in the treeview or not at all). You can set up Dragon1 to fit your modeling strategy best.
Insert Entities via the Drop-Down Menu
The second way to insert entities on a model canvas is to use the drop-down menus in the button bar.
To insert entities via the drop-down menu:
- Select a model entity in your folder. You now have a model canvas at your disposal.
- Insert a shape via the Draw Archifact menu, for instance, a stakeholder.
- Depending on your settings, you are asked if the entity should be added to the repository.
- Insert a shape via the Draw Entity menu, for instance, a process.
- Depending on your settings, you are asked if the entity should be added to the repository.
You see the entities added in the treeview.
Insert Entities via the Explorer Treeview
The third option to add entities to the model canvas is to drag them from the Explorer treeview to the model canvas.
To insert entities via dragging:
- Select a model entity in your folder. You now have a model canvas at your disposal.
- Now select an entity from a folder and drag it to the model canvas (push the mouse button, but do not let go before you have dragged it).
- You see the shape is added onto the canvas.
If the entity was already added to the model canvas, it will not be added again (default setting).
Link Entities to Shapes in the Model
We have created a model with entities on a canvas and entered entities in the repository (the cabinet folders). Now, we have to connect the two.
To link the entities:
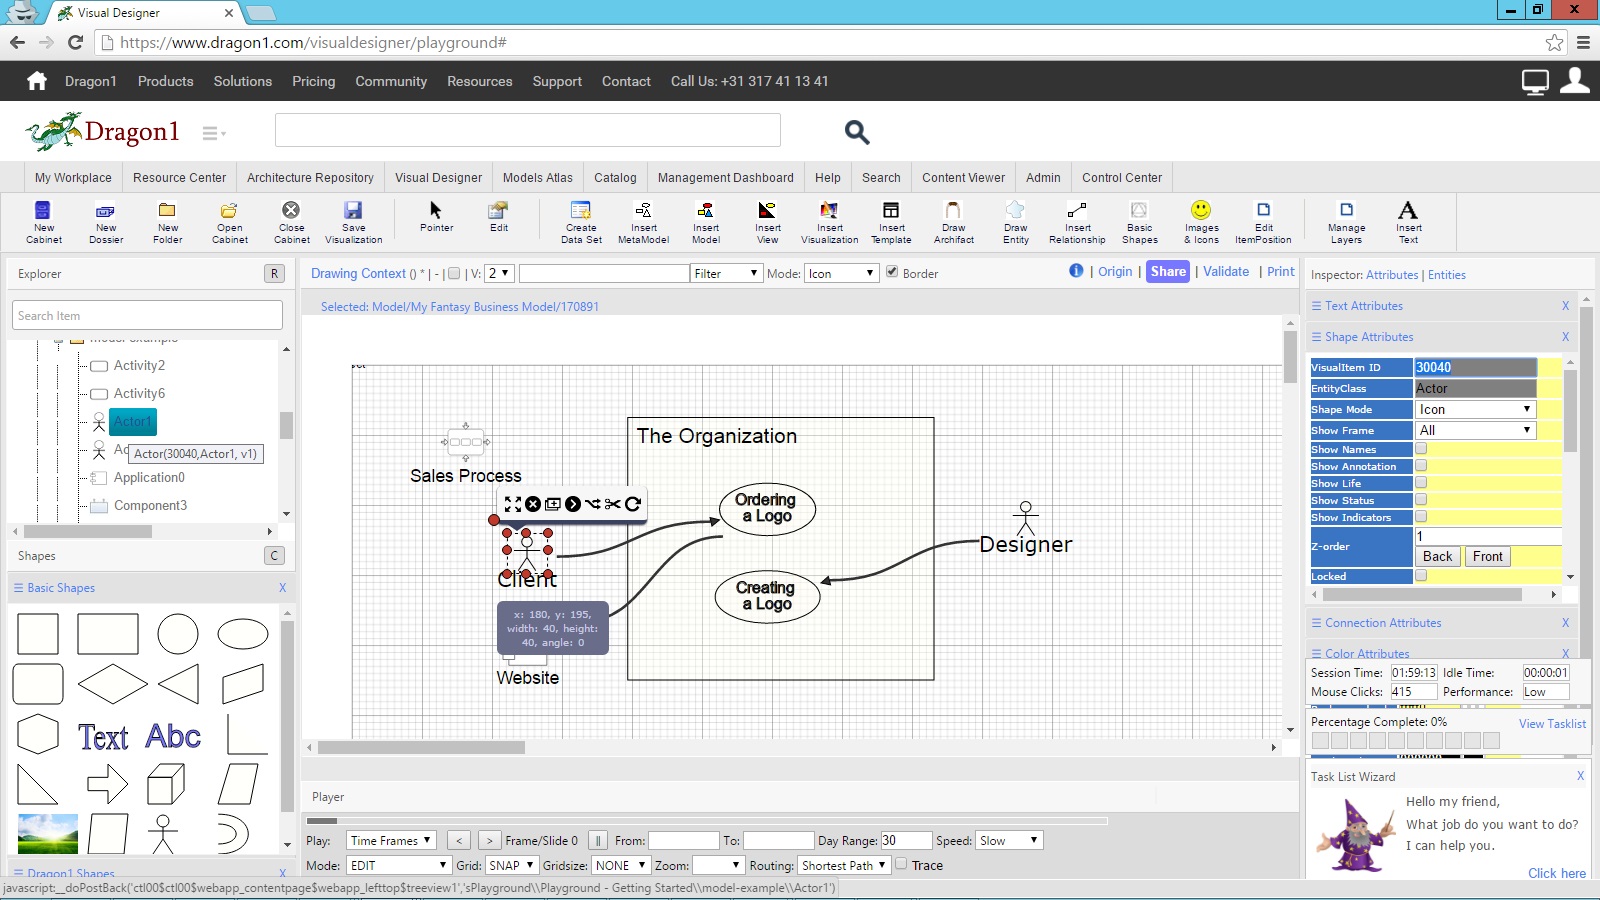
- Select a shape on a model canvas.
- Expand the Shape Attributes TAB in the Inspector.
- Enter a VisualItem ID for the shape.
- Enter an EntityClass for the shape.
- Do a mouse over an entity in a folder to see the tooltip for that entity. It reveals its Entity Class Name and Entity ID (example tooltip: Actor(30100,Actor1,v0).
You are free not to link shapes on the canvas to entities in the repository. If you link them, you can reuse the data from the entity in views, visual items, and visualizations. So it is up to you what you do.
Set up Relationships
To give a name to a connection:
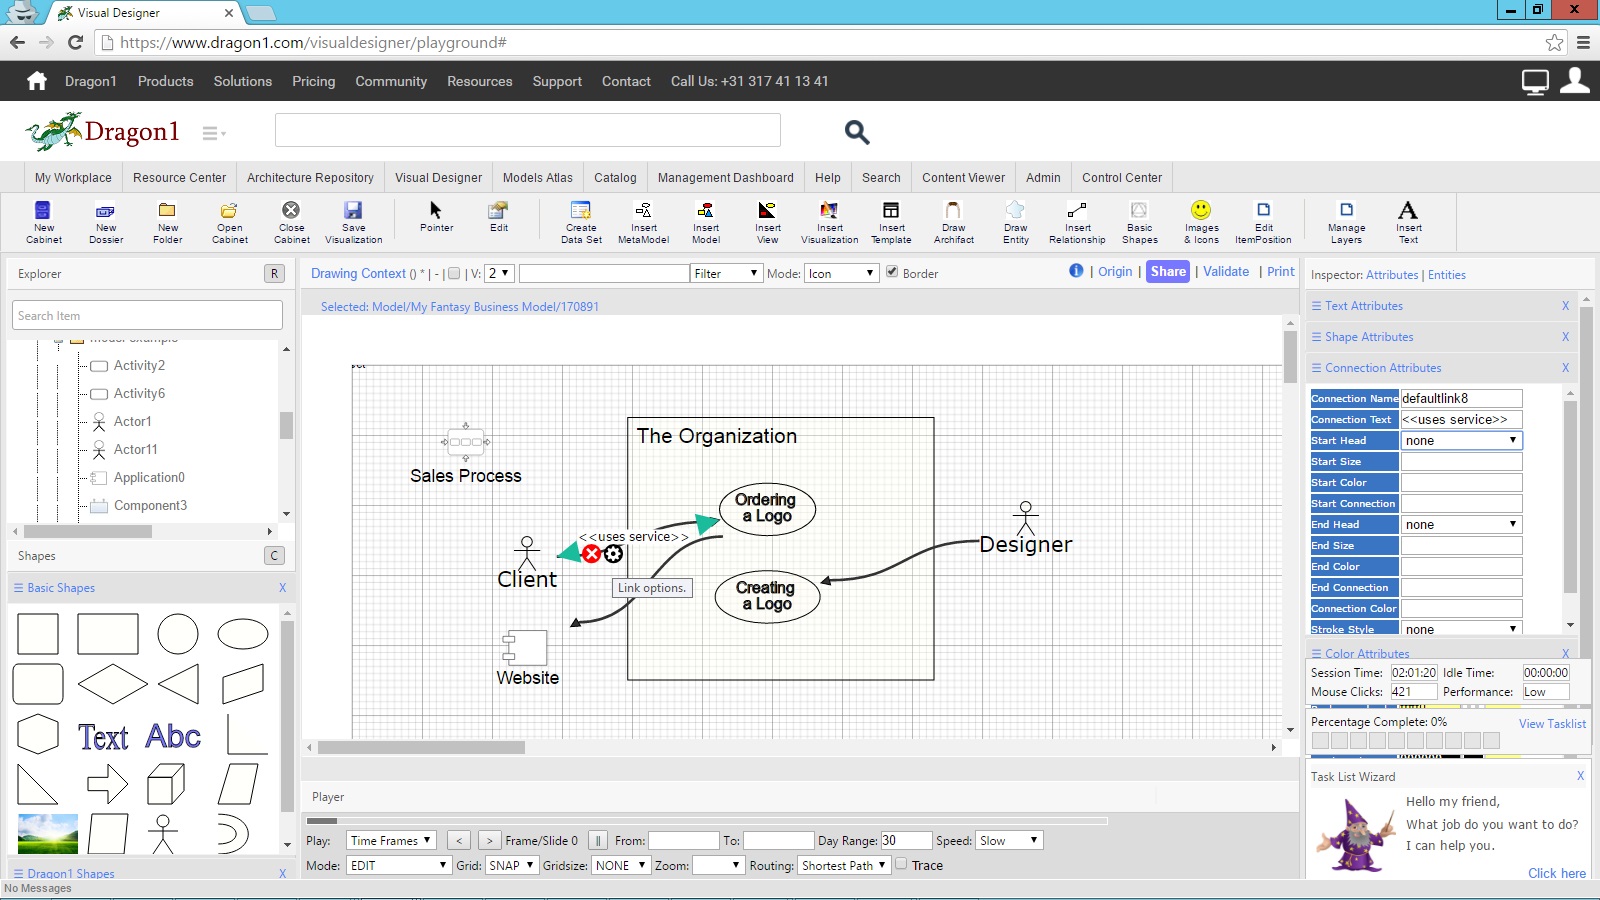
- Select a model in the folder.
- Expand the Connection Attributes panel in the Inspector.
- Click on the 3-line symbol (the menu icon) to place the panel at the top.
- Do a mouse over on a Connection.
- Click the black wheel icon.
- Enter text in the field connection text and press TAB.
- You now see text in the Connection on the model.
- Click the Save button to make sure you save your model.
Check Setup of Shapes and Entities in the Model
If you want to check how well you have connected and linked the shapes to entities, you need to switch the mode in the player bar from EDIT to NORMAL or PRESENTATION.
- If you have not linked a shape to an entity Class, the shape will say 'empty class name'.
- If you have not linked a shape to an entity ID, the shape will say 'empty entity ID'.
- If you have not linked a shape to a known entity Class, the shape will say 'unknown class name'.
- If you have used a different title for the linked entity than for the shape on the canvas, the title of the shape will be colored blue, and the default popup in Normal Model and Presentation Mode will show the original and the changed title.
- If you have linked the shape correctly and did not use a different name, the name will be colored black.

