Enter Data
Entry of Data Entities
The Dragon1 platform has two applications for entry of data entities:
- Collaboration application (this page)
- Architecture Repository
Read more about importing data using CSV files via Architecture Repository.
Read more about importing Excel Sheets (XLSX) via the Import application.
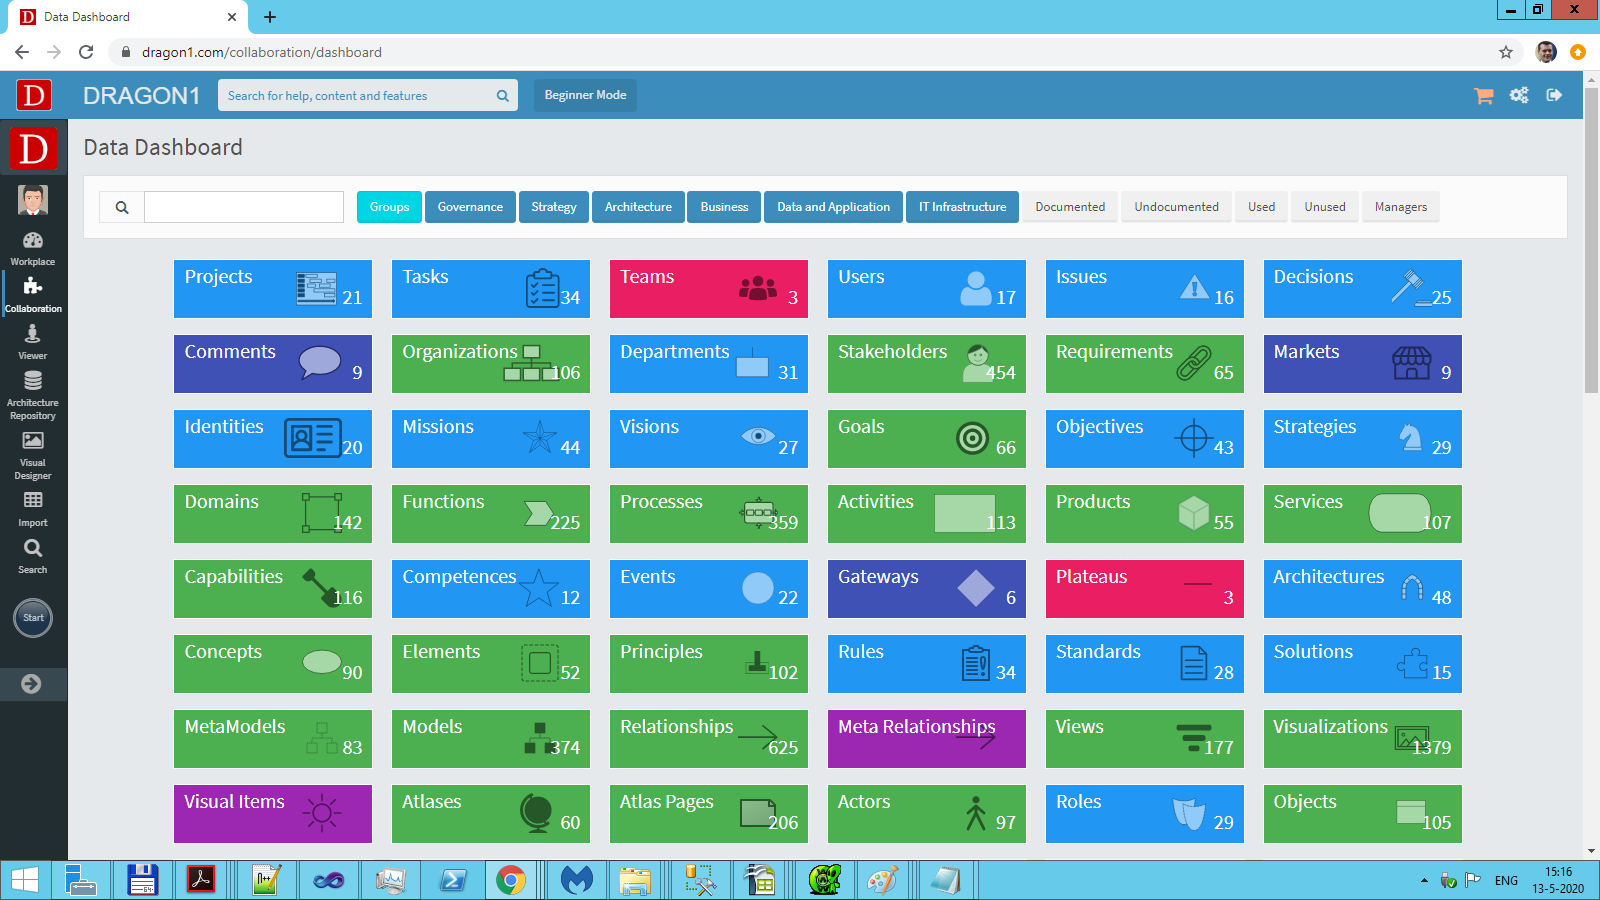
The starting point of entering data manually via the Collaboration application is the Data Dashboard.
The Data Dashboard shows over 60 out-of-the-box Entity Classes (Object Types) for which data entities can be entered immediately.
The color of an Entity Class box in the data dashboard will change depending on the number of items in the Data List for that Entity Class.
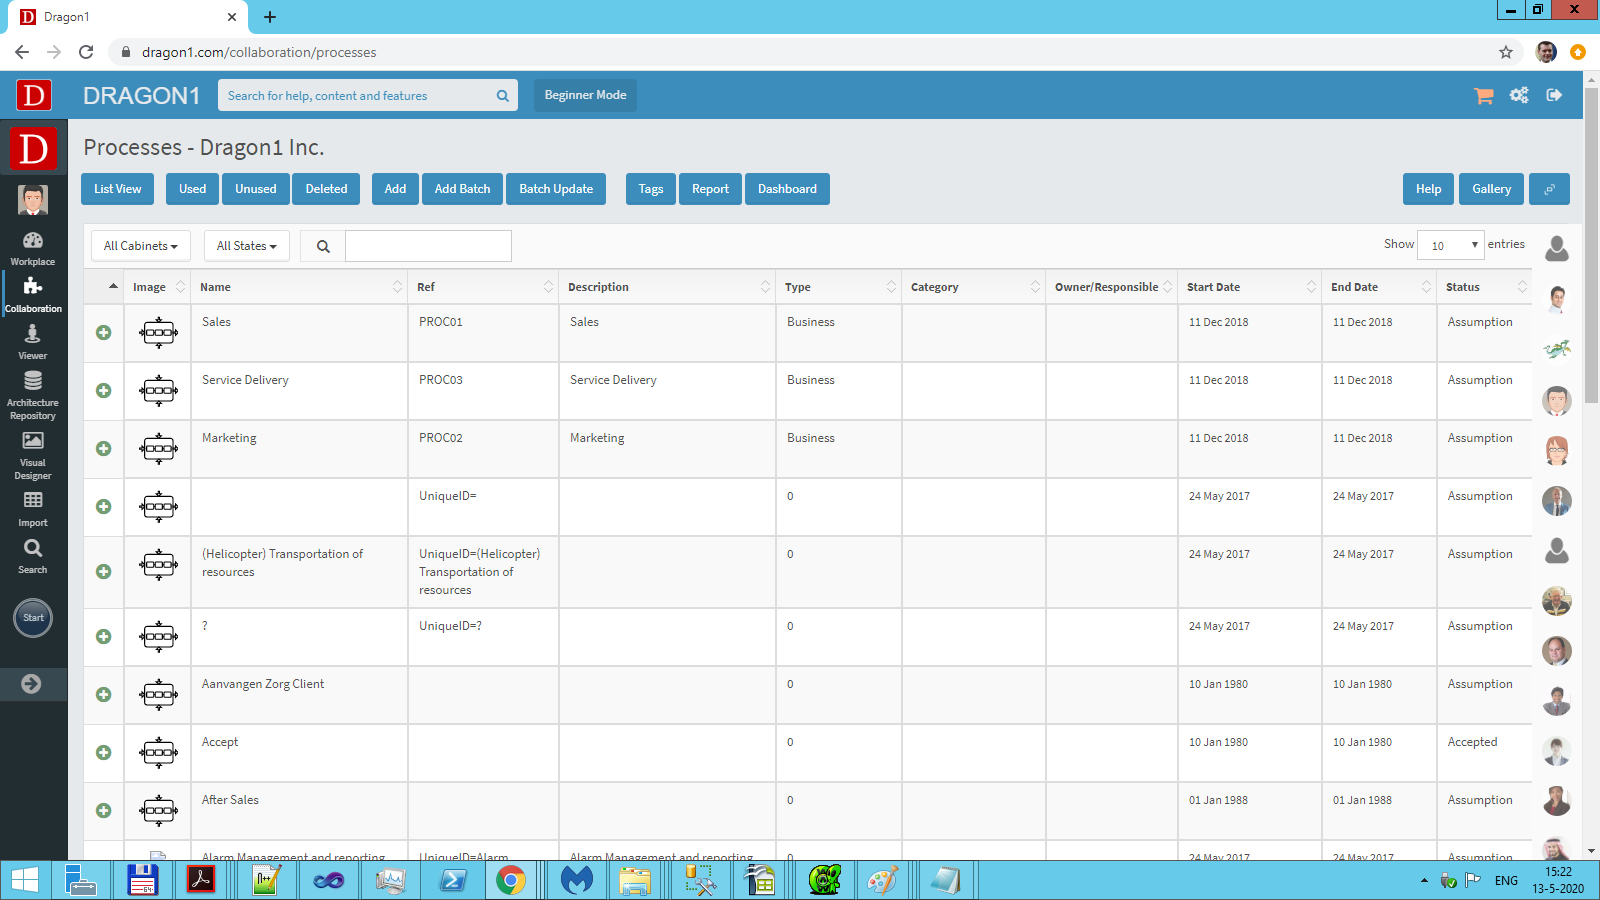
By clicking on a panel, you will enter the Data Entities Lists for the Entity Class.
Additional Entity Classes can be added to the Data Dashboard by picking them from the other 200 Entity Classes in the Settings application.
Data can be entered one by one or by batch.
Key Data Entities
The key entities (or data objects) to create or enter in the repository are:
- Cabinet
- Dossier
- Folder
- Atlas
- Atlas Page
- Atlas
- Model
- Relationship
- View
- Visualization
- Architecture
- Concept
- Capability
- Principle
- Element
- Process
- Data Object
- Application
- Service
- Server
How to Enter Data
To enter data:
- Log in.
- Click 'Collaboration' in the left side menu.
- Click 'Data Dashboard' to navigate to the Data Dashboard.
- Click on a tile (e.g. Process or Application).
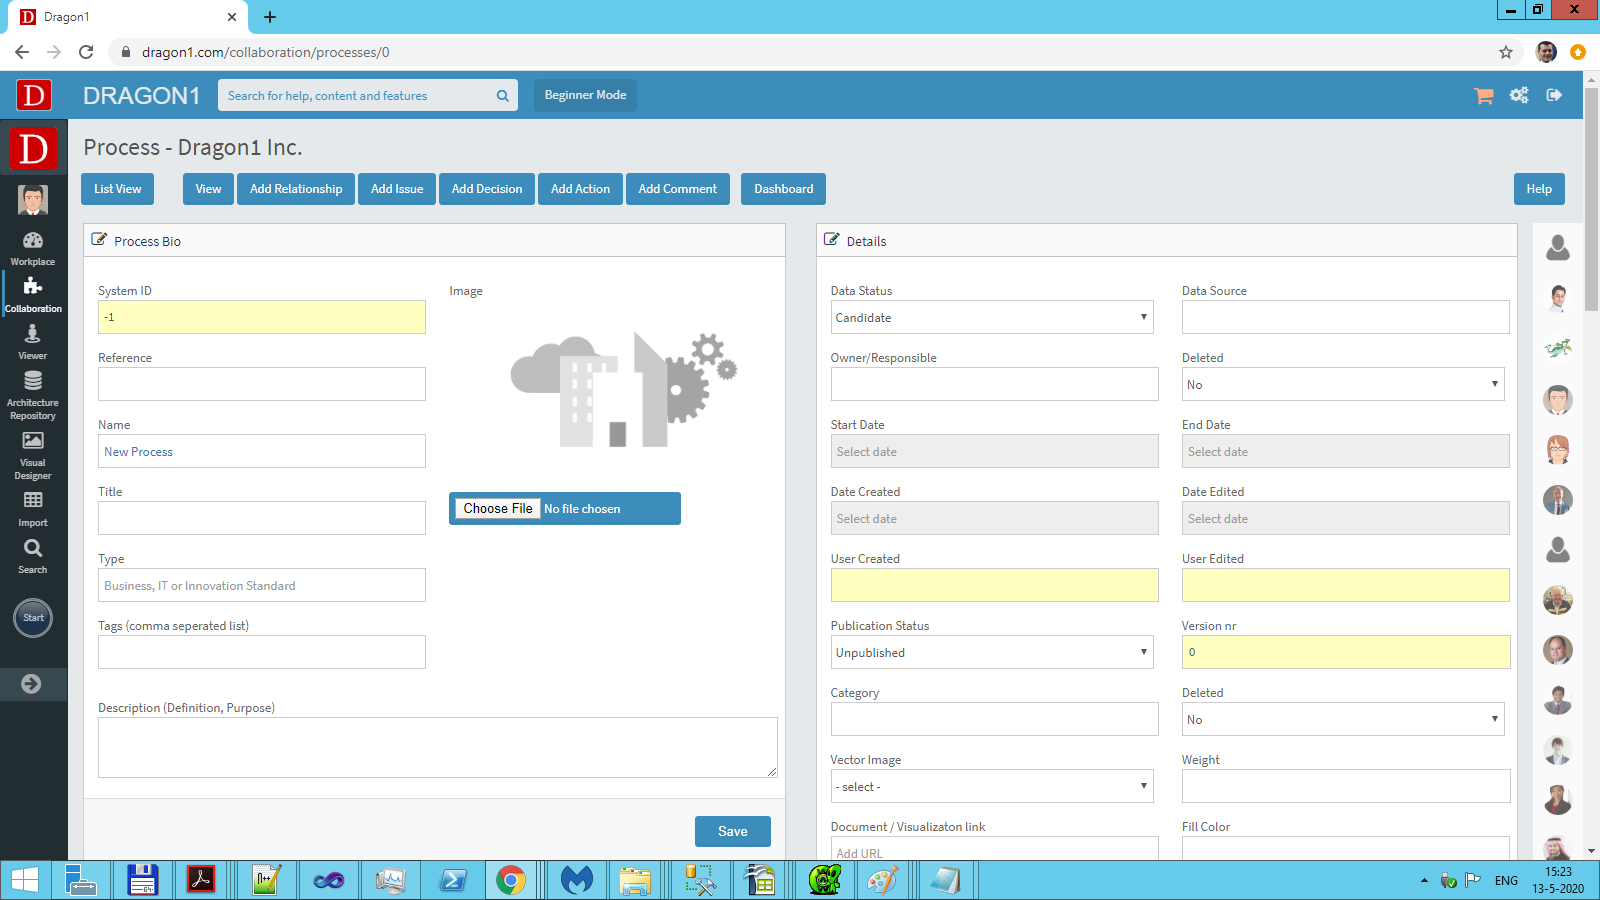
- Click on the Add button.
- Enter a Name for the Entity Class (process or application).
- Enter a description.
- Optionally add an image
- Click on the 'Save' button.
Add Batch of Data
Use the following steps to enter an Entity Classes by batch:
- Log in.
- Click 'Collaboration' in the left side menu.
- Click 'Data Dashboard' to navigate to the Data Dashboard.
- Click on 'Process' or 'Application' (or any other Entity Class).
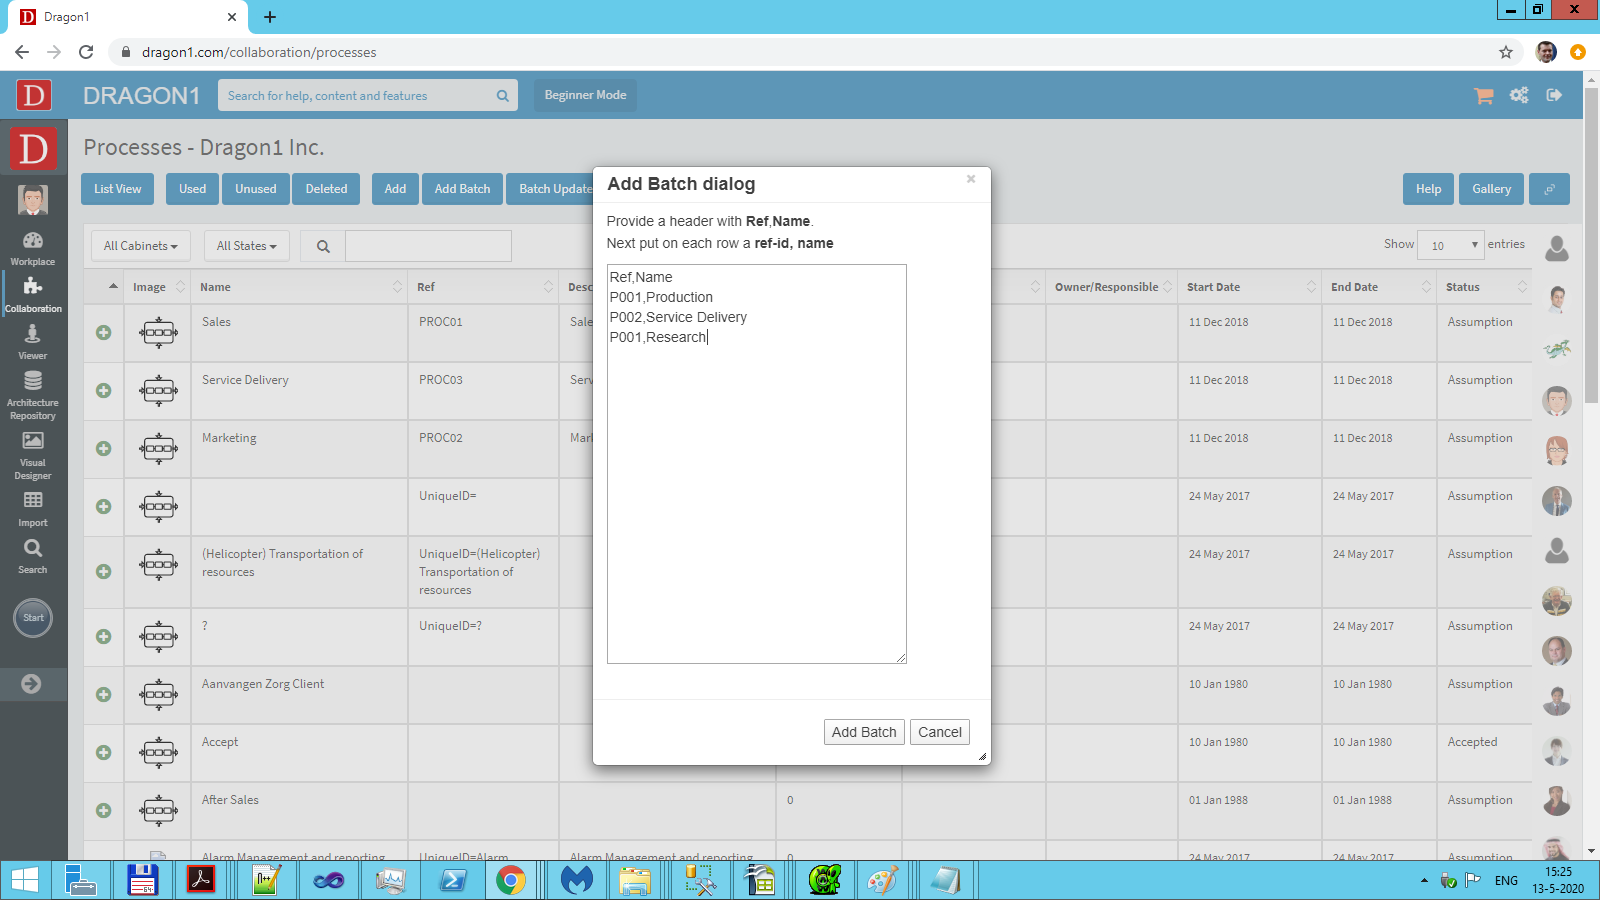
- Click on the 'Add Batch' button.
- Enter a list of names as indicated by the dialog.
- Click the 'OK' button.
The list of data is added in batch to the Data List.
Add a Document Link
Follow these steps to enter a document link:
- Log in.
- Click 'Collaboration' in the left side menu.
- Click 'Data Dashboard' to navigate to the Data Dashboard.
- Click on 'Process' or 'Application' (or any other Entity Class).
- Click on an item in the Data List.
- Click on the 'Edit' button.
- Enter a URL in the Document / Visualization Link field.
- Click on 'Save'.
When this data entity is clicked upon in a visualization in the Viewer, at the left, in the menu bar, a link button containing the link provided here is shown.
To see all the available document or visualization links, click on the Relationships button in the Viewer and click on toggle links.
Add a Highlight Link
To enter a highlight link:
- Log in.
- Click 'Collaboration' in the left side menu.
- Click 'Data Dashboard' to navigate to the Data Dashboard.
- Click on 'Process' or 'Application' (or any other Entity Class).
- Click on an item in the Data List.
- Click on the 'Edit' button.
- Enter Highlight:name in the Document / Visualization Link field. The name will be the name of an entity in the visualization.
- Click on 'Save'.
When this data entity is clicked upon in a visualization in the Viewer, the related data entity is highlighted in a different color.


