Use Tags for more powerful insights
The Need for a Tagging mechanism
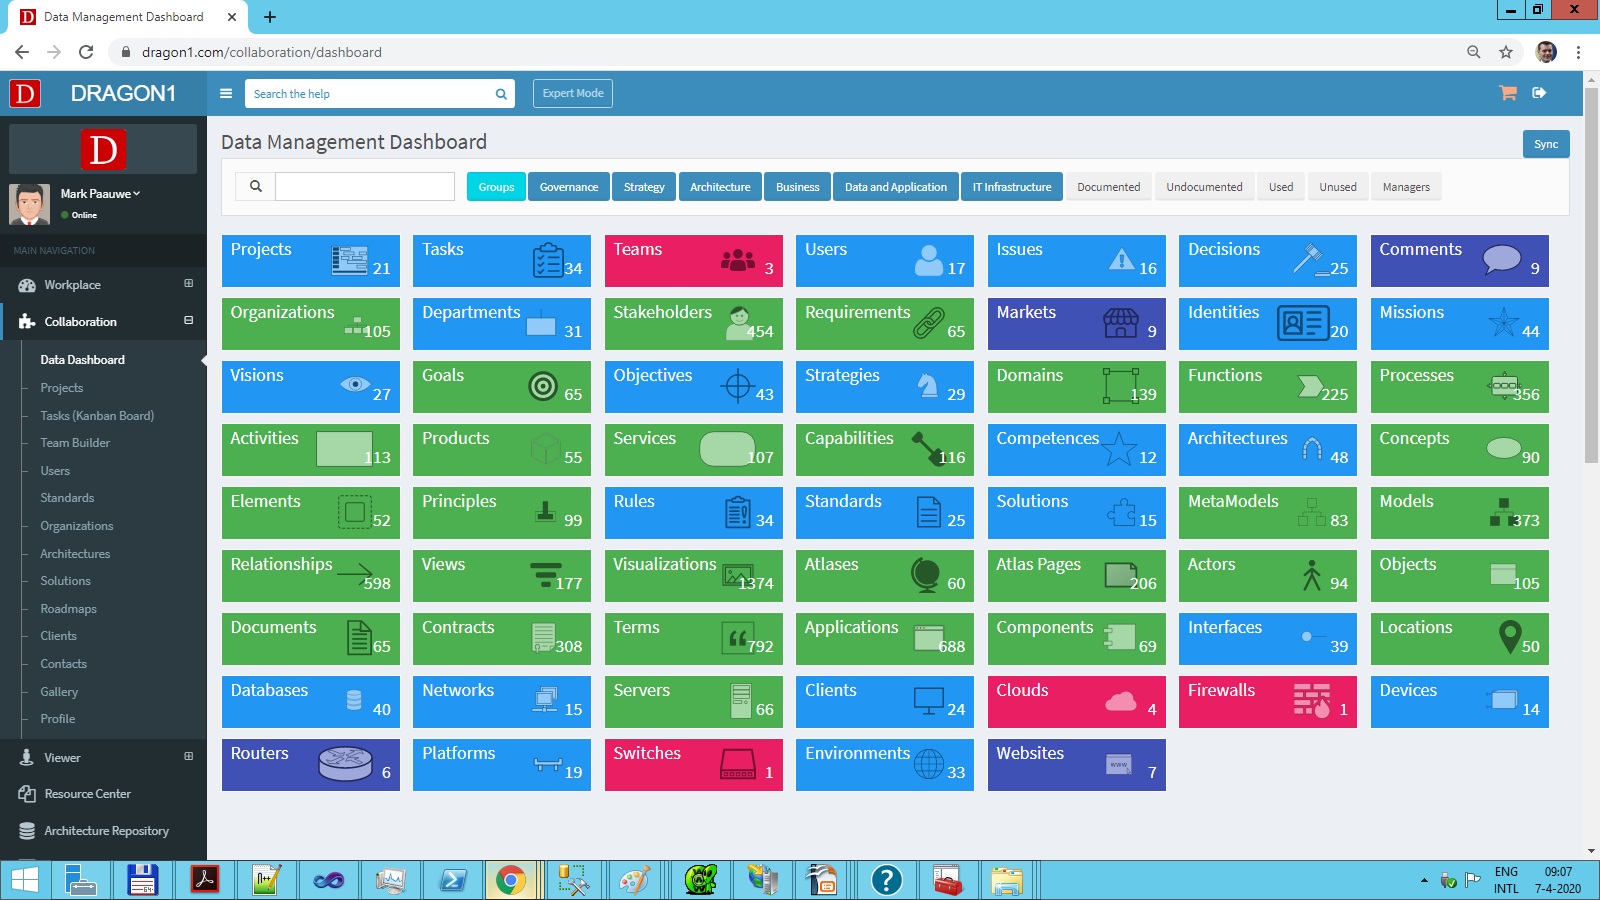
When working with Entity Classes, Relationships, Models, and Visualizations, numbers can add up pretty easily. See the Data Dashboard below and pay attention to the high counters in the tiles (e.g., 1374 Visualizations).
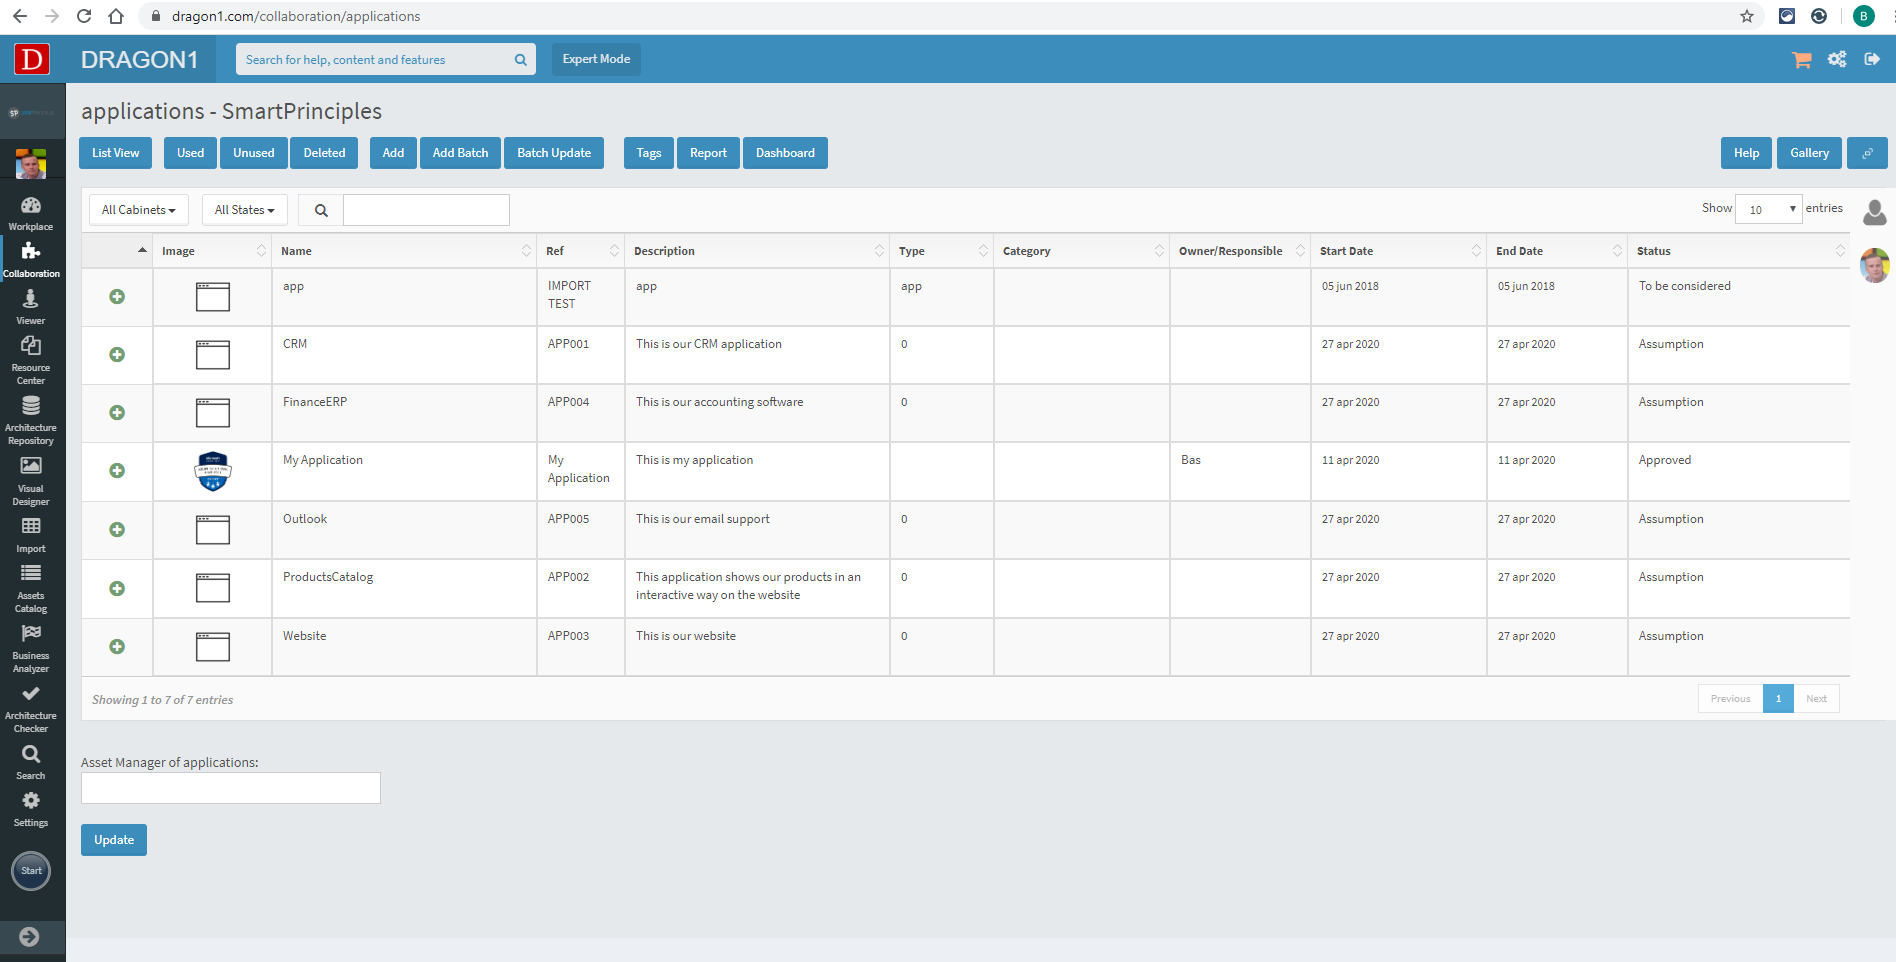
A list containing many pages can be presented when clicking a tile to enter the list view of the Entity Classes, Relationships, Models, and Visualizations. Making it hard to find the required item.
Dragon1 offers a tagging mechanism to drill down to the required items, making it easier for you to find the items. Also, using Tags helps get more insights into the underlying relationships between items.
Two kind of Tags
Dragon1 supports two kinds of Tags:
- System Tags
These can be set by the account manager and are stored in a separate list. - Data Tags
A user can set these tags on the fly to an entity.
How to work with Tags?
Working with Tags is straightforward and works the same way among Entity Classes, Relationships, Models, and Visualizations.
Getting started is as easy as following the steps below:
- Log in.
- Click 'Collaboration' in the left side menu.
- Click 'Data Dashboard' to open the Data Dashboard.
- Click on a tile (e.g., Applications) to open the list view.
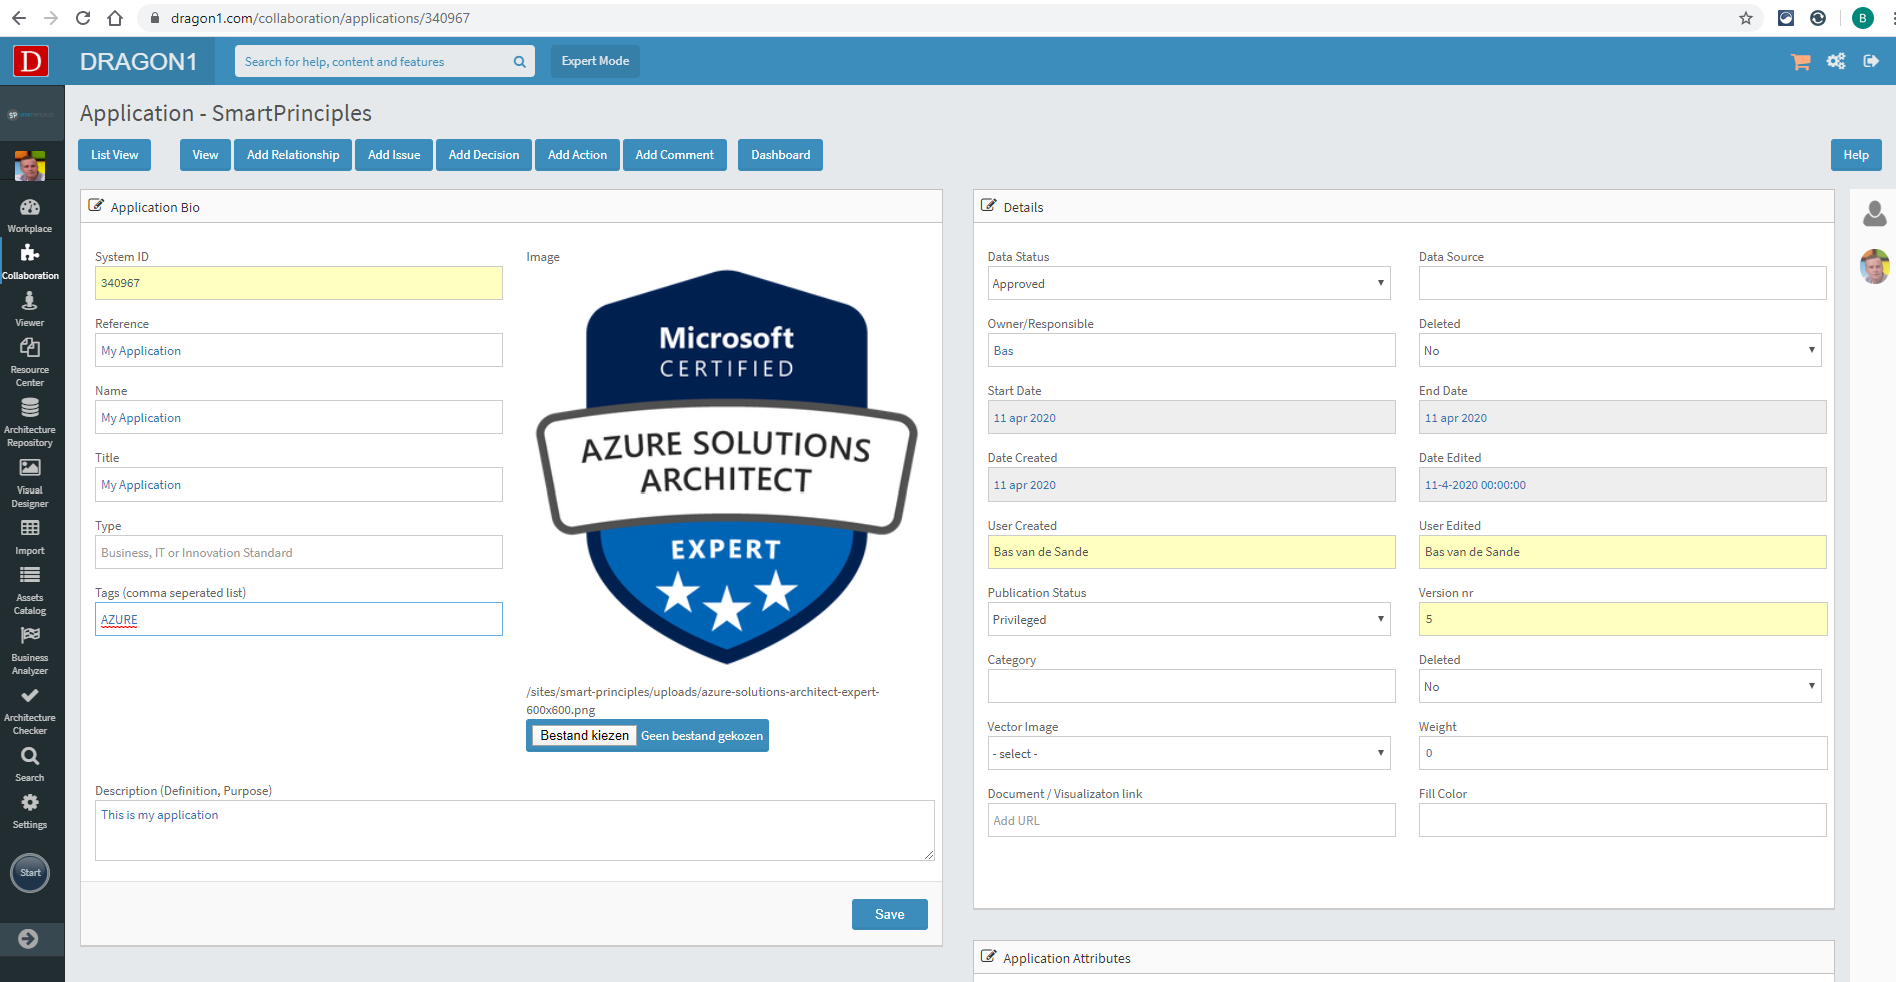
- Click on an item to open it for editing (e.g., My Application).
- Click on the 'Edit' button in the top buttonbar.
- Enter the tags in the 'Tags' text field. Tags should be comma-separated.
- Click the 'Save' button.
- Click the 'List View' button in the top button bar to return to the list view.
Repeat these steps for other items in the list view.
How to use Tags for filtering?
When the Tags are applied to the items in the List View, the list can be filtered using Tags. To do this, follow the next steps:
- Log in.
- Click 'Collaboration' in the left side menu.
- Click 'Data Dashboard' to open the Data Dashboard.
- Click on a tile (e.g., Applications) to open the list view.
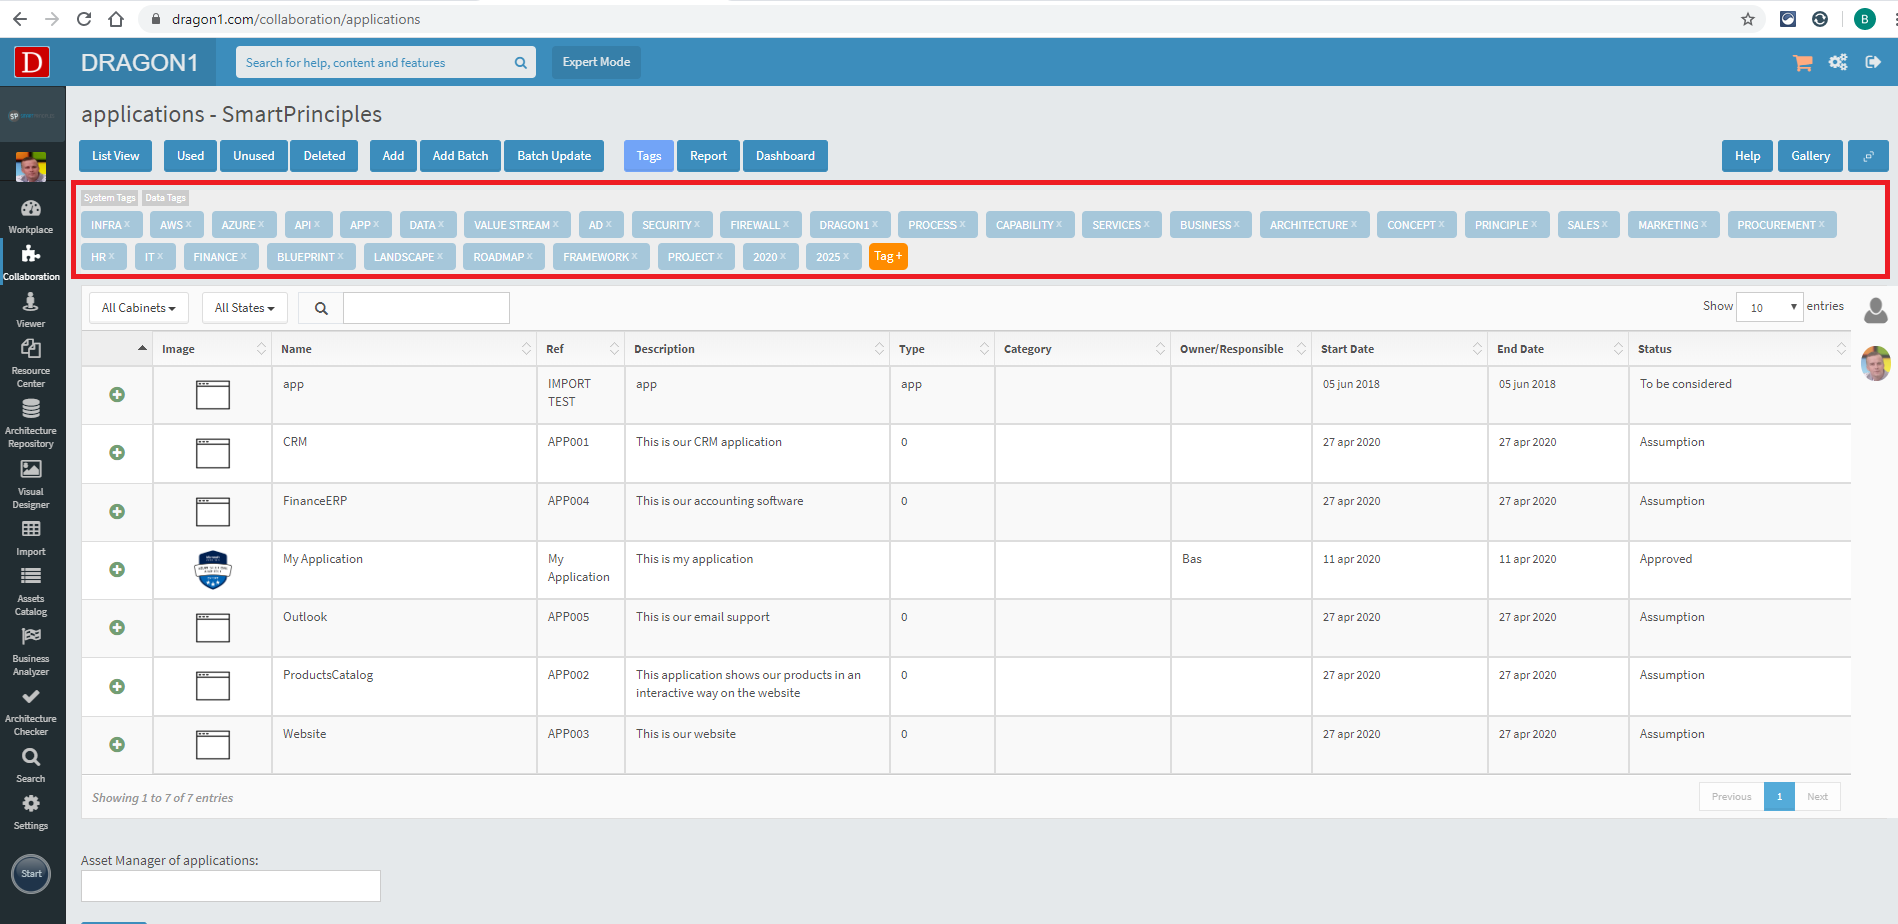
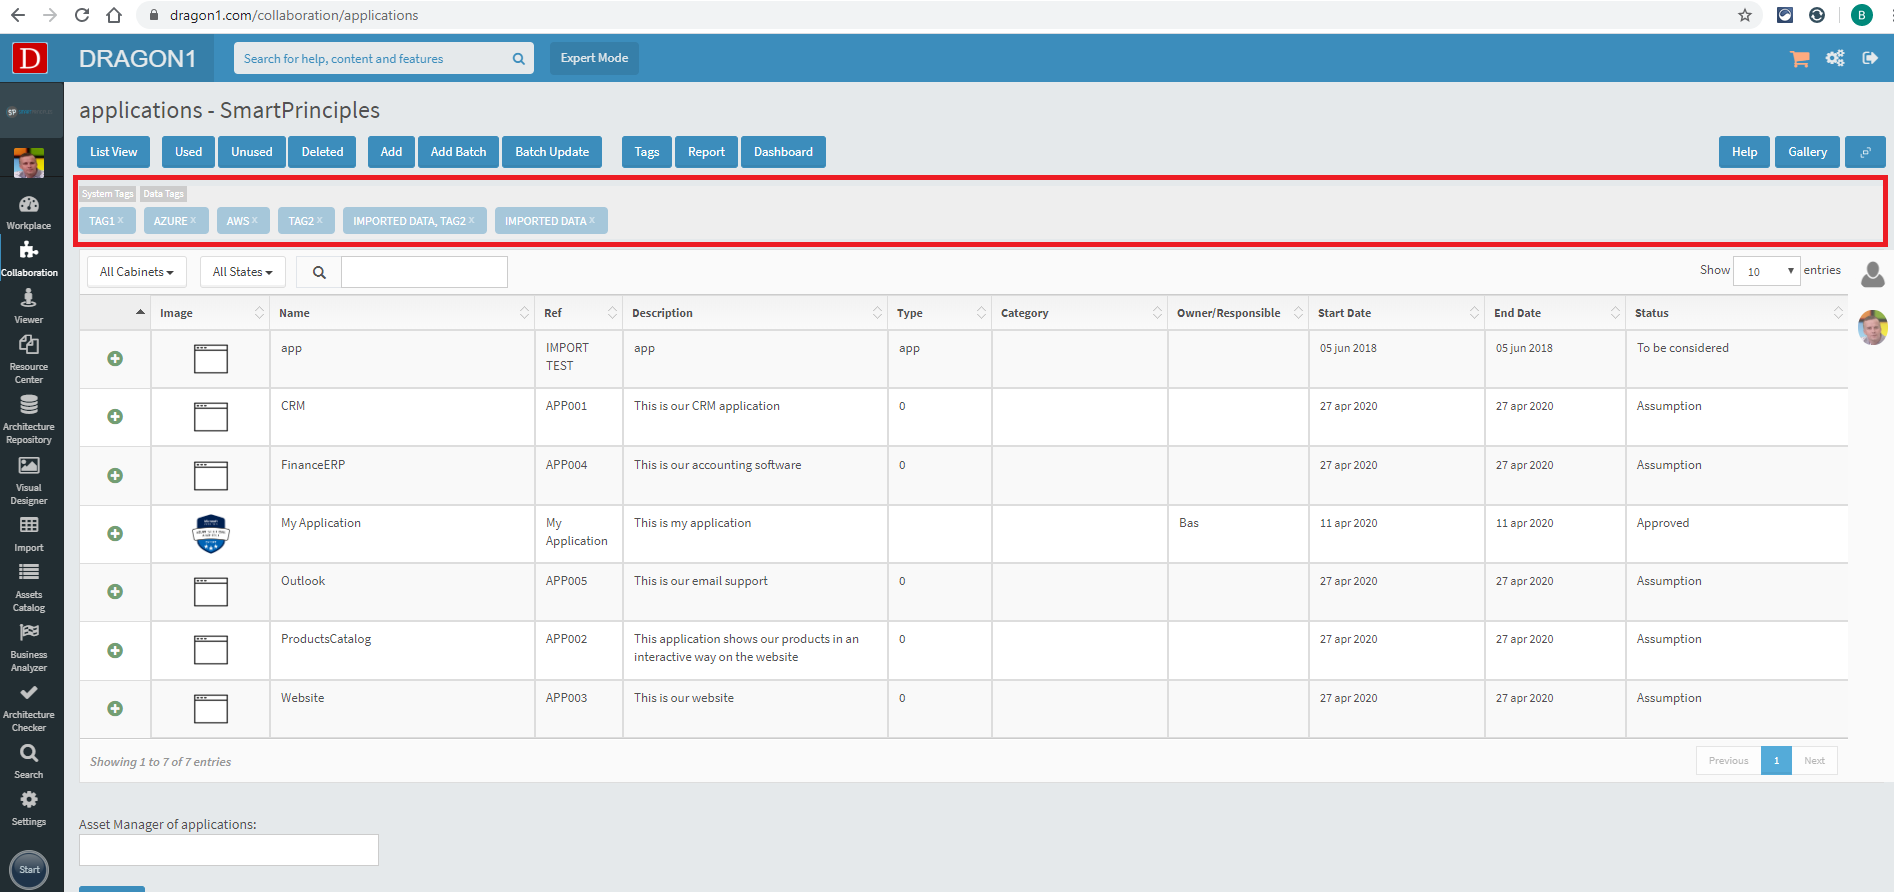
- Click the 'Tags' button in the top button bar.
A Tag navigation pane will appear at the top of the screen, containing two tabs: System Tags and Data Tags.
- Click a Tag (e.g., Azure), and the list gets filtered on the Tag.
By clicking multiple tags, a quick drill-down is made on the list, providing powerful insights.


